

haychdee
-
Posts
156 -
Joined
-
Last visited
-
Days Won
3
Content Type
Articles
Profiles
Forums
Gallery
Events
Downloads
Posts posted by haychdee
-
-
Can I pop my name on the reserve list please Mike.
Cheers
Haydn
-
So this update is well overdue as round 4 is already over half way but here goes....
For my round 3, 'Wyrd Science' entry I eventually decided that I would convert Hoffman up into a GW style techpreist. The play on the theme being Wyrd Science in GW style. Originally he was going to be fairly subtly converted with a terror tot cherubim and standing in a little workshop which would have hidden nods to Imperium tech.
However, as you will see from the pics below I got a bit carried away and in the end he hardly resembled Hoffman anymore. In that sense I am not really too happy with the conversion but aside from that I learnt new skills in scratch building the servo arm and I discovered a new way to paint flesh.
And here he is in various stages...
The first layers down of Hoffman's robes and at this point not so OTT

The early WIP's of his servo arm. It took me a long time to finally settle on a style

The almost complete servo arms and cables. Cables were made with Green Stuff World's roll/tube maker (awesome bit of kit!)

A close up of his cherubim. It's made from a Terror Tot with the wings of Nicodems vulture. The hammer is all scratch built

A collage of pics from the finished piece

And my final pic as it was submitted

Sadly the work did not pay off as I scored low with 27 and dropped down into silver. My opponent @Whirler put in a great entry and had a well deserved win. I knew that no matter the result I was in for a tough one but a tad disappointing it came in so low.
Admittedly I know my entry has many flaws, as usual I spent too long converting and the painting was rushed.
Nevertheless, all C&C, questions or queries welcome
hd
-
 5
5
-
-
So time for a long overdue update...
For round 2 I was pretty hyped about theme but in the end I really struggled.
Having a spare Nicodem hanging around I decided I'd use him for the main piece. I had an idea to make a small vignette of him rezzing up a zombie and his coffin from the groud with all the earth rising up with him. I was gonna try copy the magic effect Curtis used based on the tutorial on Massive Voodoo and try out some OSL.
Well I got cracking on with the project and made good progress early on but I hit set back after set back mid way through. I ended up making 2 coffins, 2 vignettes, having to strip Nico after I fluffed the NMM and then 2 bases for him. Nothing seemed to go as planned and I literally only just got it in on time with 37 seconds to spare. I even ended up having to take a half day from work as I even got the deadline wrong!
But that being said, my round 2 scoring sat at 41 to 27 and luckily I kept my gold spot for 1 more round.
So here are the finished pictures, I have WIP's but as there are so many I'll spare them...


And here's a height comparison between my two entries

If you're following the competition you'll know that round 3 is well underway and I'm pleased to say that I'm much more confident with this entry however as my opponent is Whirler I very much doubt I'll be in the gold tier much longer.
I'll be sharing my round 3 WIP's very shortly but until then all C&C is welcome.
hd
-
6
-
-
It's nice to see all your LJ crew lined up together, these looks great, good job!
That Dr. Grimwell is superb! Really nicely painted and so smooth
Look forward to seeing more
hd
-
1
-
-
Thanks for the kind feedback.
I really struggled with the white as it just required way more layering up than I'm used to. I found it less forgiving when I was trying to shade at a later stage. To be honest I'm actually getting some painting tuition at the moment so it's maybe something I'll address after the competition is over. Although I've painted for years I've not really taken the time to learn and understand technique and theory as I've always focussed more on the modelling aspects.
As for the tongue and claws I completely agree. These were some of the details that didn't get the attention they deserved as I rushed the entry towards the end. My round 2 entry will have much more focus on the painting and I want to make sure everything gets the correct amount of time spent on it.
hd
-
2
-
-
- Popular Post
- Popular Post
Hey all,
So round 1 of the Iron Painter is over and I can't hide the fact that I'm pretty stoked to have just grabbed myself a spot in the gold tier.
However, I know there's a lot of talk, argue and debate in the forums as to the judging and criteria. I tend not to really get involved in these exchanges so I won't be discussing it on here but I will say that the results (and some of the follow up comments) from this round will definitely influence some of my decisions in round 2.
On a personal note, I was a bit gutted to see Stark's (grey_kardinal) entry be ranked in bronze. I'm not here to discus the ins and outs of it all but I've always enjoyed checking out his work and I really like his style so this was a shame to see it receive the score it did. If you've not seen his stuff yet go check out his thread here.
Onwards with the pictures...
First off I got Teddy all primed up. For me this is normally the stage where I can spot any major defects in my sculpting work. It's quite hard to tell when it's in the green stuff stage as I'm always filing and scraping it down.

After the first 2 sessions I'd pretty much got the dress done. The whole thing turned out a bit more magenta looking than planned but I was happy with it. I got the base coat down for what became the nightmare that was the cream and I got the base down on the fur so I could get a grasp on the contrast to the dress.

A few stages ahead here everything was a bit more built up and the bow was now complete. I had played around with doing the bow in yellow but it just didn't quite look right to me so I opted for the lilac instead. I just felt it suited the theme better but really I'd have been happy with either option.

And then, skipping a lot of little stages, we have the final submission. This was also my first time doing the stringy gore effect so I was really quite happy with how that turned out, really made a difference to the whole overall feel of the mini for me.


So as I could have guessed I really didn't take enough pictures again and I really will try for the next round.
However, I have learnt some valuable lessons from this project which I'll take into round 2:
1. I will not be sculpting/converting on that scale again for IP. It cost me a week and it took away a lot of time from painting
2. I will NOT be painting white or cream again in this comp as it's the devil and made me very unhappy
3. I need to improve my photography game as it took hours and hours to get it somewhat close to how I wanted it
4. I need better time management and I need to leave more than the last day to get my entry photographed
So that's it for round 1. The whole project took me in the area of around 50 hours to complete which has been quite draining but I have something I'm really happy with. I look forward to round 2 and hopefully I can try to keep my gold status though the competition is pretty tough.
As usual questions, queries or C&C are all welcome.
HD
-
10
-
- Popular Post
- Popular Post
Hey all,
As a lot of you maybe aware it's that time of the year again where the forum goes painting crazy as we delve into the annual Iron Painter comp!
Last year sadly due to work timings I never even made it passed round 2 but it's a different story this time around. I've upgraded my work space, splashed out on some new paints, upped my brush game and no more working crazy hours. So hopefully this time I can see it through to the end!Along with the hobby upgrades I've also received a bit of paint coaching and in order to flex my artistic muscles and up my game I will be trying out new styles and techniques throughout this competition. As an avid converter and modeller I will also be doing my best to work in some extravagant basing, display pieces and green stuff work. The whole idea is just to push my abilities and get a little out of my comfort zone.
So, round 1...
Announced nearly a week ago now round 1's theme is 'Pretty in Pink' which is nice and broad.
After a little brainstorming I decided that I'd be sculpting Teddy in a rather fetching little dress which I decided to model off the Candy fig.
Whilst waiting for Teddy and supplies to arrive from Element Games I thought I'd work on the base.
I went for a style I'd never tried for before and built it up using poly filler rubble, miliput and plasticard.
I laid the rubble down first, then filled in gaps and built up a layer of miliput ready for the sanding stage. I then cut and shaped out some plasticard tiles and secured them on top. I then sanded it where needed, painted it all up and added a few tufts of grass. I picked black and white so it will contrast nicely with the large amount of pink to come.

Thne Teddy arrived!
As with all my projects its a slow and steady pace to begin with. Using Candy as a reference picture I decided to start with the torso and build out from there as there would be plenty of details going on top. I've never done frilly dress bits before so I had a crack at these first to make sure I could do them. Luckily I found a nice easy technique to these and I got them done pretty quick.

Next I finished off the torso, shoulders and arms. After these had all cured I marked out with the red paint where the collar would be going and I then cut/scraped this are down. I then began making the basic skirt shapes which would form the underskirt in the end. I added a bit of detail on the underside of the dress which is meant to resemble ruffles (is that a word) of a dress or tutu. It wasn't really an important feature but it made me feel better about the sculpt.

I then added a base collar along with frilly edges. Once this had cured I then went back and built the collar up a bit more. You can see that I had also started adding some of the upper skirt layer which had to be quite bulked out to fill in those big gaps.

And then the have the almost final build. The upper skirt layer was much trickier than I imagined but I got there in the end. I added a bow on his back and in the end I had to re-do his front bow as it was getting a bit swamped by the existing green suff. I added a little belt/ribbon running around the waist between the bows to cover the join and give me some extra details to paint. All that's remaining is the gap filling, filing and last minute tweaks. Receiving feedback from AWP on Facebook I think I might model a little bow on Teddy's head just to really finish it off.

And that's it for now. I will be finishing off the last modelling bits tomorrow before getting him all primed up for some pink goodness. I'll be keeping all painting pics under wraps until I'm ready for the final submission but I'll be taking some WIP's to post after.
If anyone has and questions or would like any of my methods explaining I'm more than happy to oblige. I've skipped a few photo stages here mainly because I get so into it I forget to take any.
So far the sculpting has taken me 3 sessions at about 20-25 hours in total with the base taking another 3 or 4. It's time consuming but it's the part of the hobby I enjoy the most.
HD
-
16
-
Paid.
Looking forward to this, really enjoyed last years.
-
Lovely work as always!
Big fan of your colour palettr choices, kind of earthy but still vibrant.
Can I ask what set up you use to take your photos? Always come out at a good quality and it's something I'm trying to improve on
HD
-
- Popular Post
- Popular Post
Hey all,
It's been a slow couple of weeks but I have been making some progress across the whole crew. Im hoping to get some more comprehensive pics up in the next week...
...but until then, Santi draws nearer completion. I've been working on his face paint to add more of the Day of the Dead feel to him rather than the voodoo look. I gave NMM a go but tbh I think I might switch back to metallics.
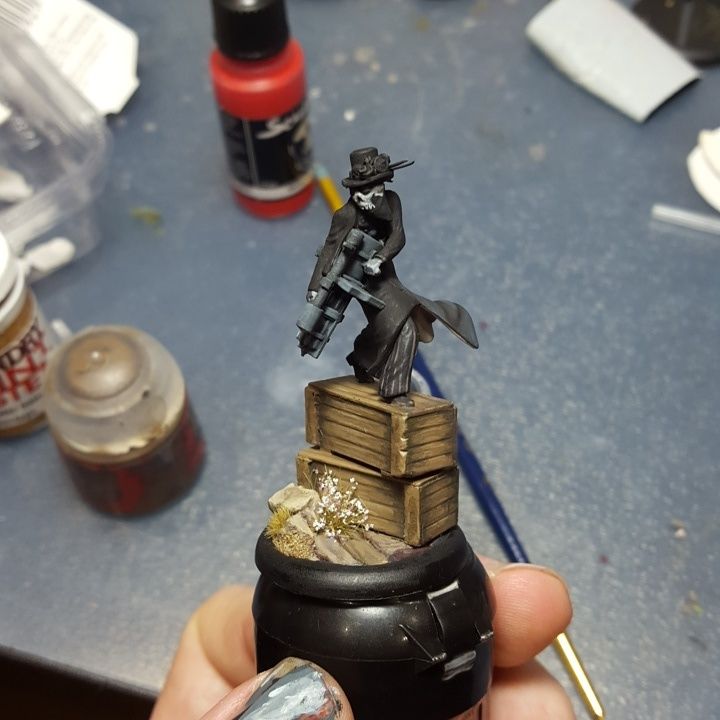
A quick pic of Nino's current state. His base colours are down and like Santi he is also sporting some pin stripe pants. I'm really pleased with his base and doing everyting to avoid chipping it now
And I am glad to say that my Perdita dilema has been resolved thanks to @BigHammer
He has very awesomely donated a Lady Legiea to me so I get to convert up my original plans. I'm just waiting on some parts to arrive and then I'll be cracking on with that conversion.
@WalkingInBlack thanks for those reference images. They are a big too sexed up for the Perdita conversion I had in mind but I might use them as reference when looking at making some Pistoleros. Will definitely be using them when deciding on my colour choice though.
So just a very small update this time but hopefully a bigger one to come next Monday.
C&C as always is welcome
HD
-
12
-
Will do my best to make it down for this.
Just need to finish my new crew
-
1
-
-
Looking forward to this.
Paid up
-
4 hours ago, WalkingInBlack said:
Or Option 3: Take some Greenstuff and start making a dress over Perdita's legs
")
Unfortunately her jacket isnt right for the theme either. Would be a big contrast between the 2 styles. Youre also right in that the TTB dresses arent the right style either.
4 hours ago, Munindk said:Rotten Belles could be an alternate source of dresses, they're cheaper than buying the Jack Daw box but $3 more than the Coryphee box. There are also a few dresses in the Female Multi-part Kit.
I did look at the belles but theres only 1 thats kinda in theme with a nice big dress. The other 2 are a bit too slutty which I suppose is just fine for the belles. The coryphee dresses arent tradational as such but they are a longer fit and have some nice details.
3 hours ago, Stark said:This is a lovely mini, thanks for the share. It would be ideal but as Im a regular tourney player I cant rely on using other minis as proxies.
Input is appreciated guys, thanks.
HD
-
1
-
-
- Popular Post
- Popular Post
Hey all,
Another update for ya'll and an intro to some of the other family members.
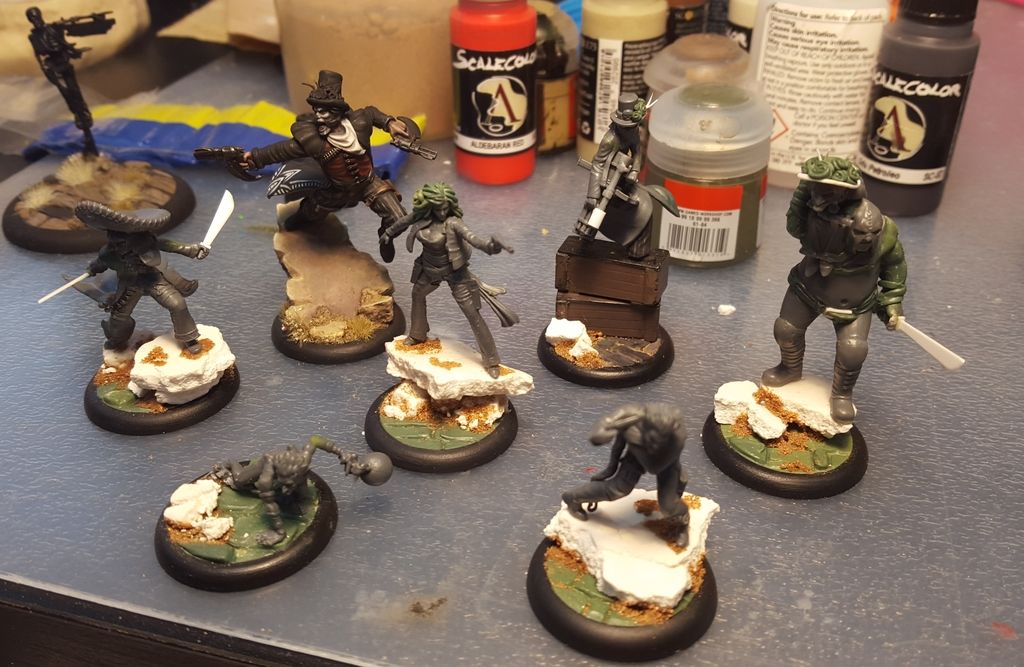
First of all here's a group shot of the family all converted and based up finally
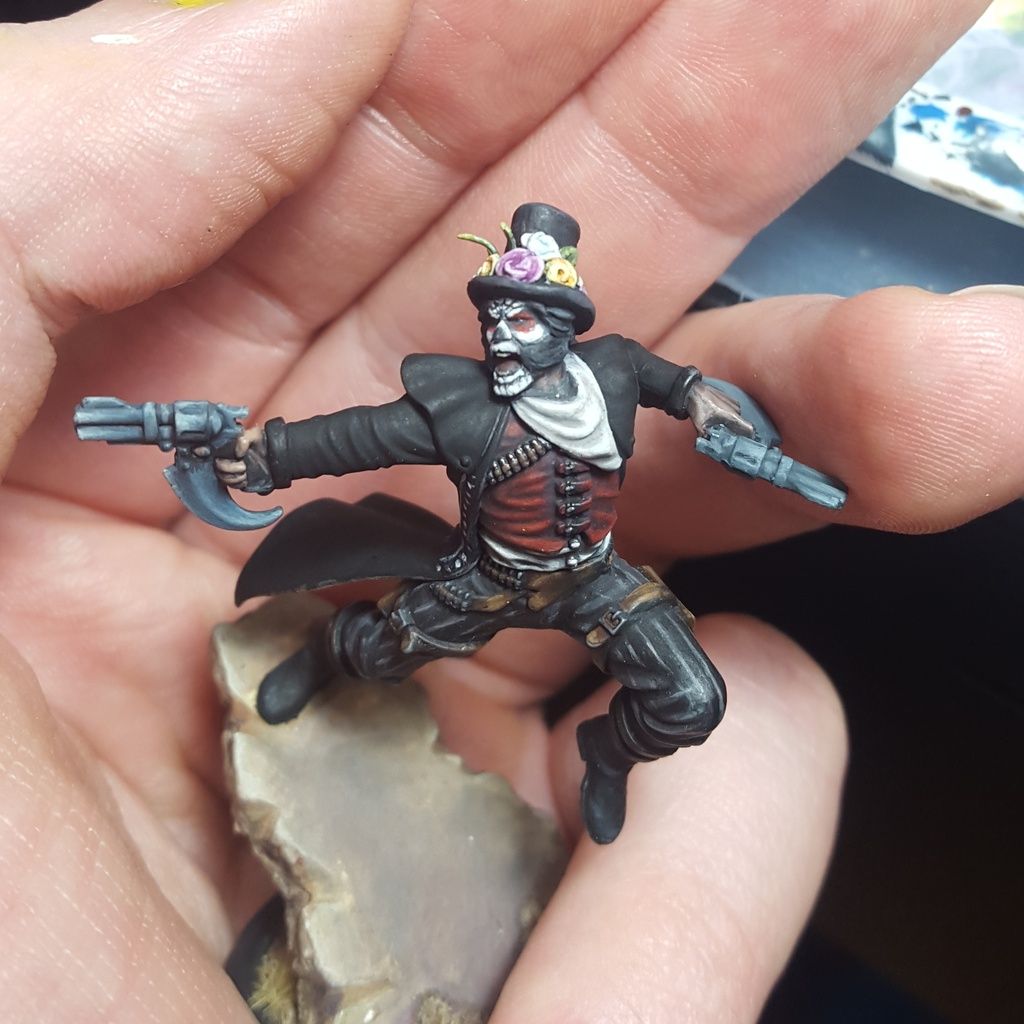
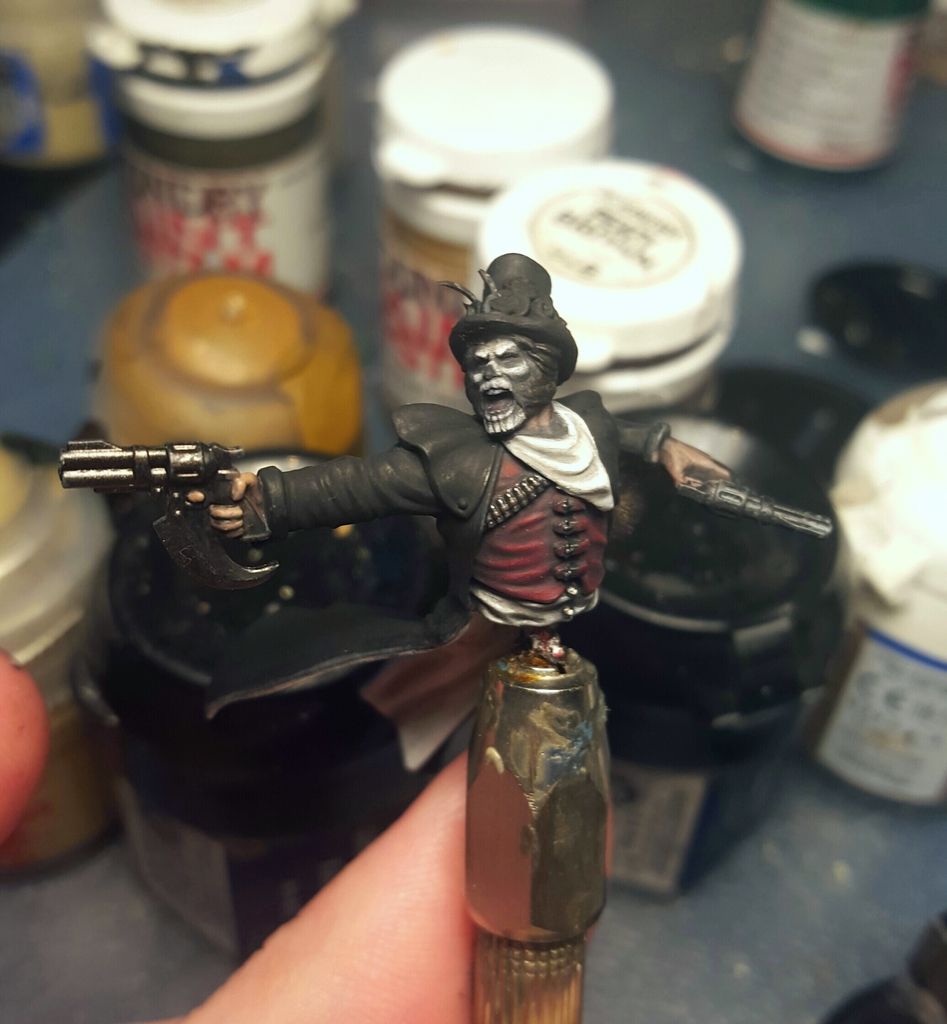
A bit more work on Santiago has been done. I've brightened up this shirt and waistcoat and begun the freehand on his coat. It's still early WIP for the freehand and I'll be adding more detail in before shading it. I felt it's the best way to get some contrast on a rather plain black area without breaking theme
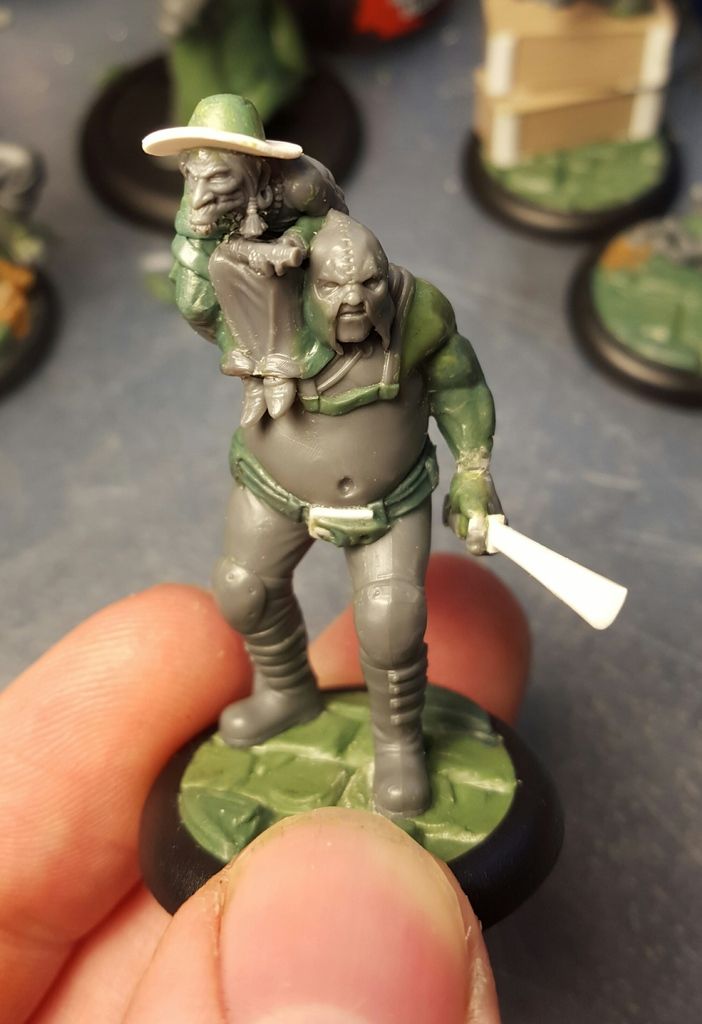
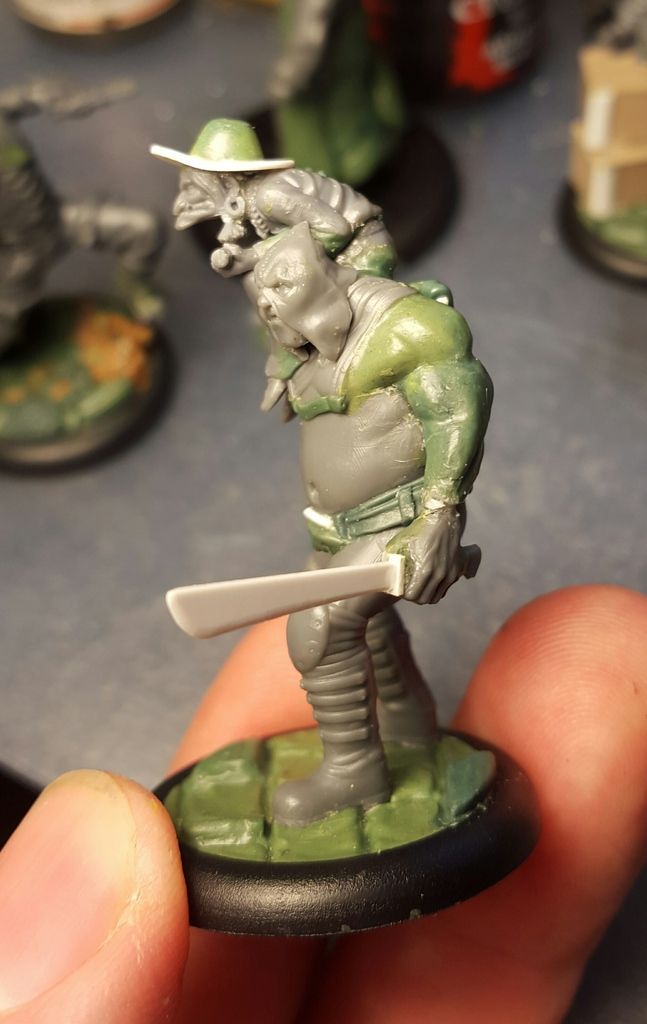
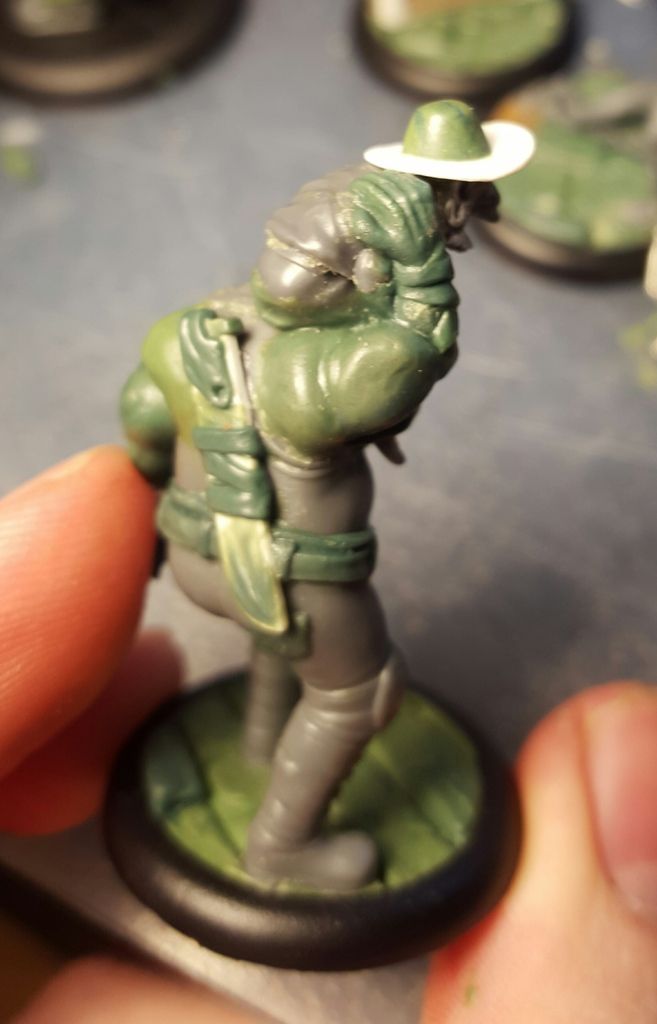
Abuela and Senor Hodor are now all done and ready for the brush. Some of the proportions are a little off but overall I'm pretty stoked with how this concept turned out and I'm looking forward to painting them up. I also changed out her hat as the sombrero just covered her up too much
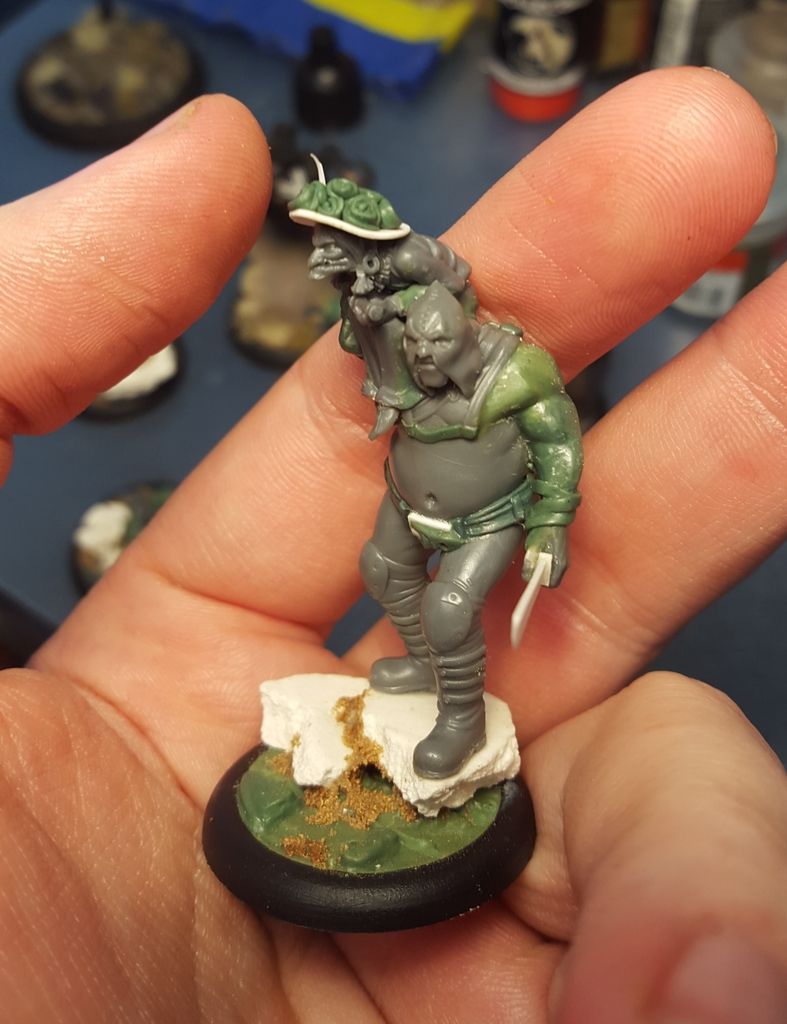
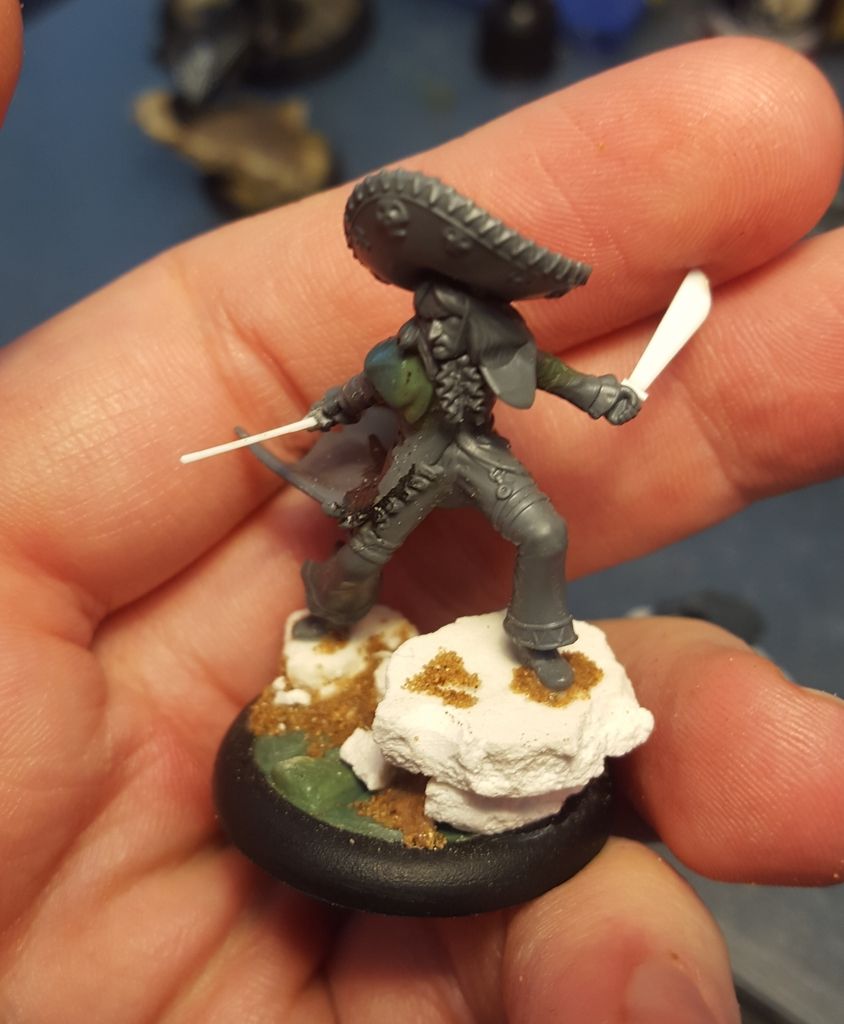
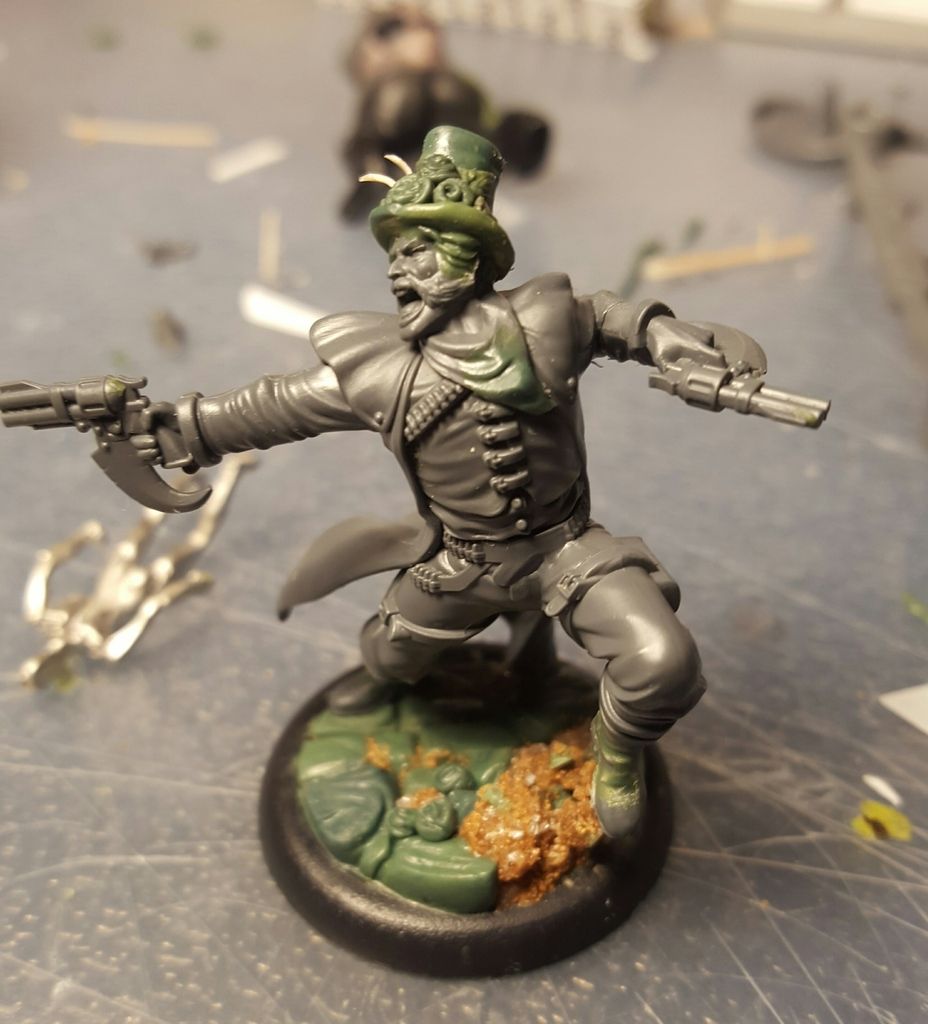
And now we have the big bro Francisco. First things first I removed that monstrous sword and fitted him with a machete. Then I thought, what's better than a model with a machete? A model with 2 machetes! His pose looks a tad odd but I tried to make him look more dynamic. I can tell you from lunging round my apartment that his pose is entirely feasible but now my neighbors think I'm a bit odd.

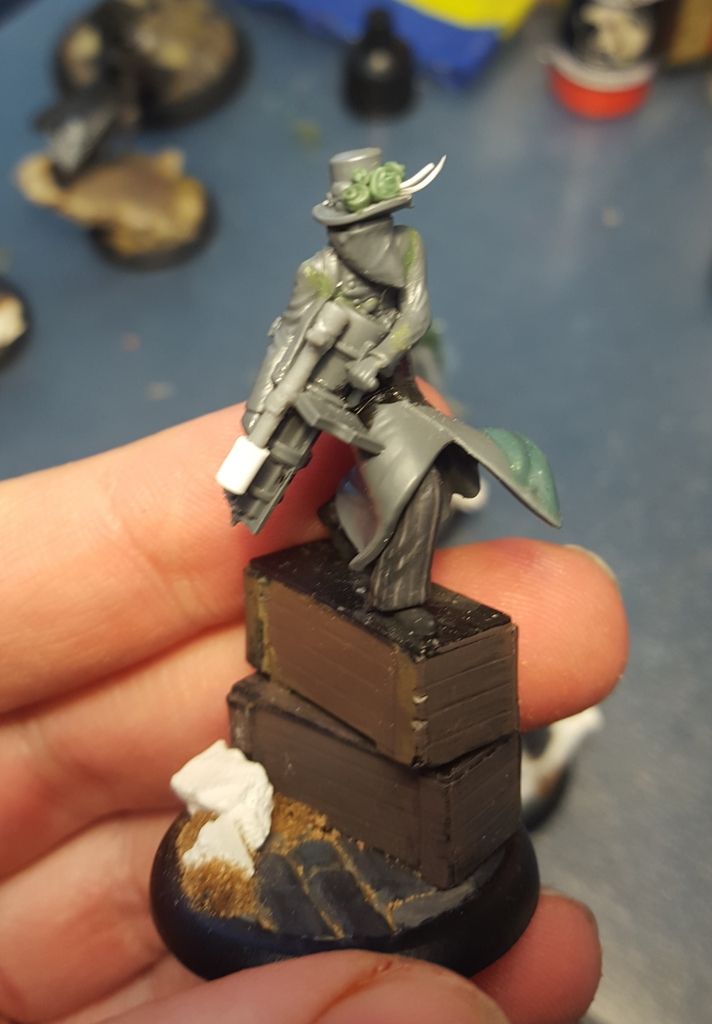
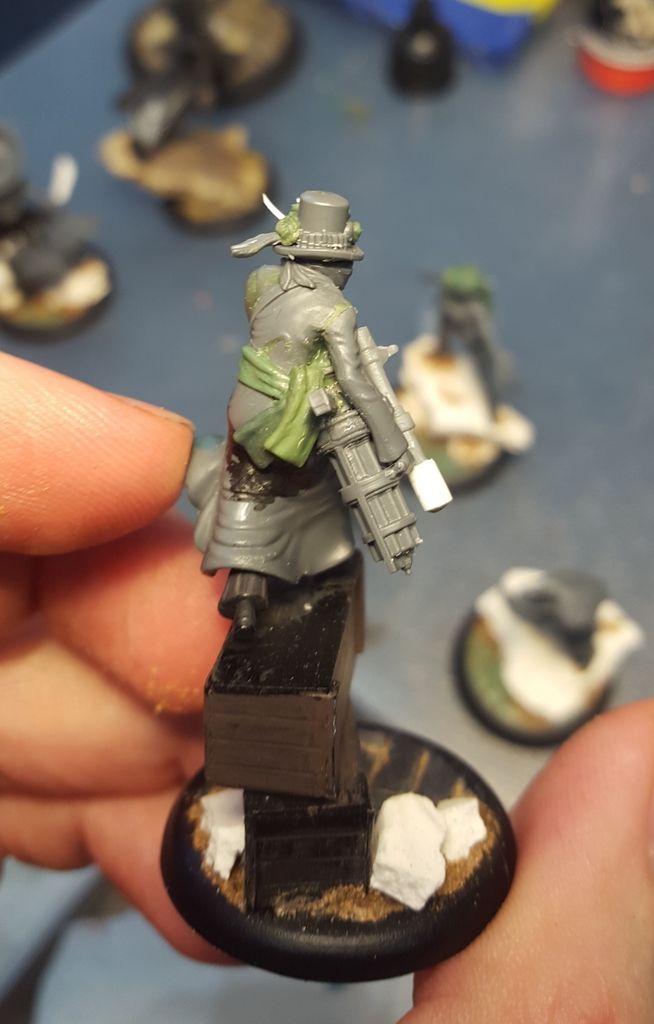
And lastly, introducing Nino! I gave this little fella some height and I modded a scope on his gatling gun for those extra snipey feels (still need to add a muzzle, oops). Converted him a little bit to allow for some colour in the painting stages. Added a sash around his waist and the usual flowers in his hat. The extra folds in his jacket are to help make the details look more realistic in the painting stages
And there we have it! Some of those pics are a bit ropy so I apologise. Once I get seriously stuck into the painting I'll be taking a bit more care with the photography.
On 2/13/2016 at 5:03 PM, Marlon_di_Rodean said:Dunno if someone already said that but I'd love to see perdita with a flowing flamenco skirt
No-one has mentioned it but it is something I planned to a dress (address...get it?!). When I started out I kinda loosely looked at the theme and starting with Perdita I thought just doing the hair would be enough. But the more I research the festival and the more pics I dug out the more I realised Perdita needs to be in a dress.
So I've been looking and I have 2 options. Now bare in mind I'll also be converting up Lady J to match the theme.
Option 1 - Use Lady Ligeia from the Jack Daw crew, add a new head, add some big hair and a honking great revolver. Downside to this is I'm buying a £30 box for 1 totem model. I've also considered magnetising the model to have 2 sets of arms and 2 heads so I can alternate between Perdita and Lady J but that would be a very fiddly project.
Option 2 - Use the Coryphee box to make a Perdita and a Lady J. Have Perdita as the one with 2 hands forward and model her with 2 pistols. Then have lady J as the one that's kinda already in the Lady J pose. The dresses they wear are exactly traditional but they'd definitely fit the theme I reckon. They'd both be extensively converted and I'd have a bit more freedom of the magnetised idea. Failing that, these 2 would make excellent Pistoleros as well.
As always, your C&C is welcomed and any questions or ideas, just fire away!
HD-
10
-
Have you checked out Warlord website?
http://store.warlordgames.com/collections/feudal-japan-1467-1603 -
I use photo frames for mine. I just replace the backing/insert with foam core but it all sits flush under the frames edges.
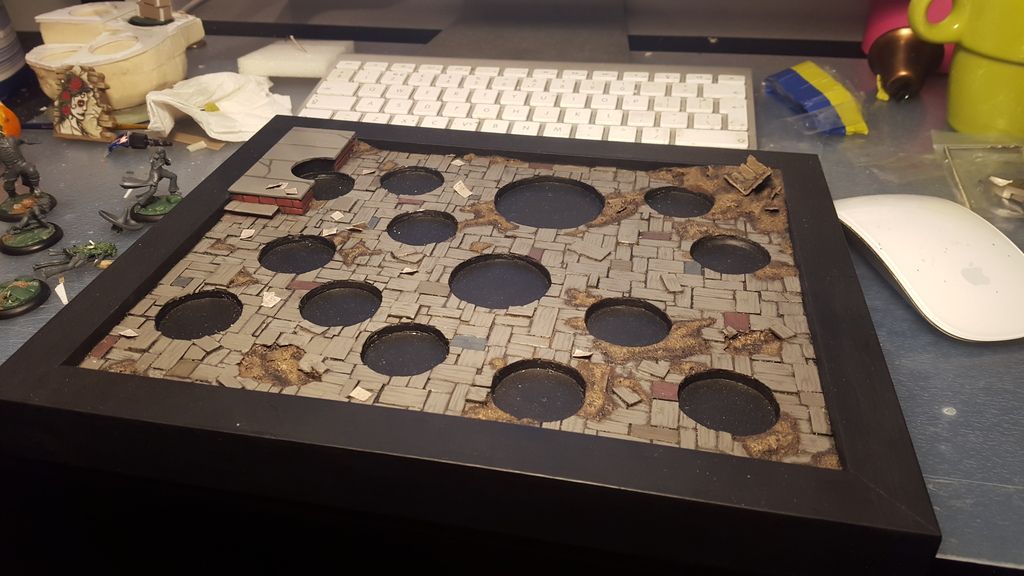
HD
-
4
-
-
THIS IS NOT MY MODEL
Credit to Antwan Ragland from A Wyrd Place
Just thought you might want to have a look at this style. Probably my favourite Jack Daw. The bricks are made of foam so stick on well.

-
2
-
-
- Popular Post
- Popular Post
Hey all,
It's been a while since my last update but I've been working away on several of the crew members and I have a few more bits to show you all.
First of all, I have made some more progress on Abuela and her now named Senor Hordor!
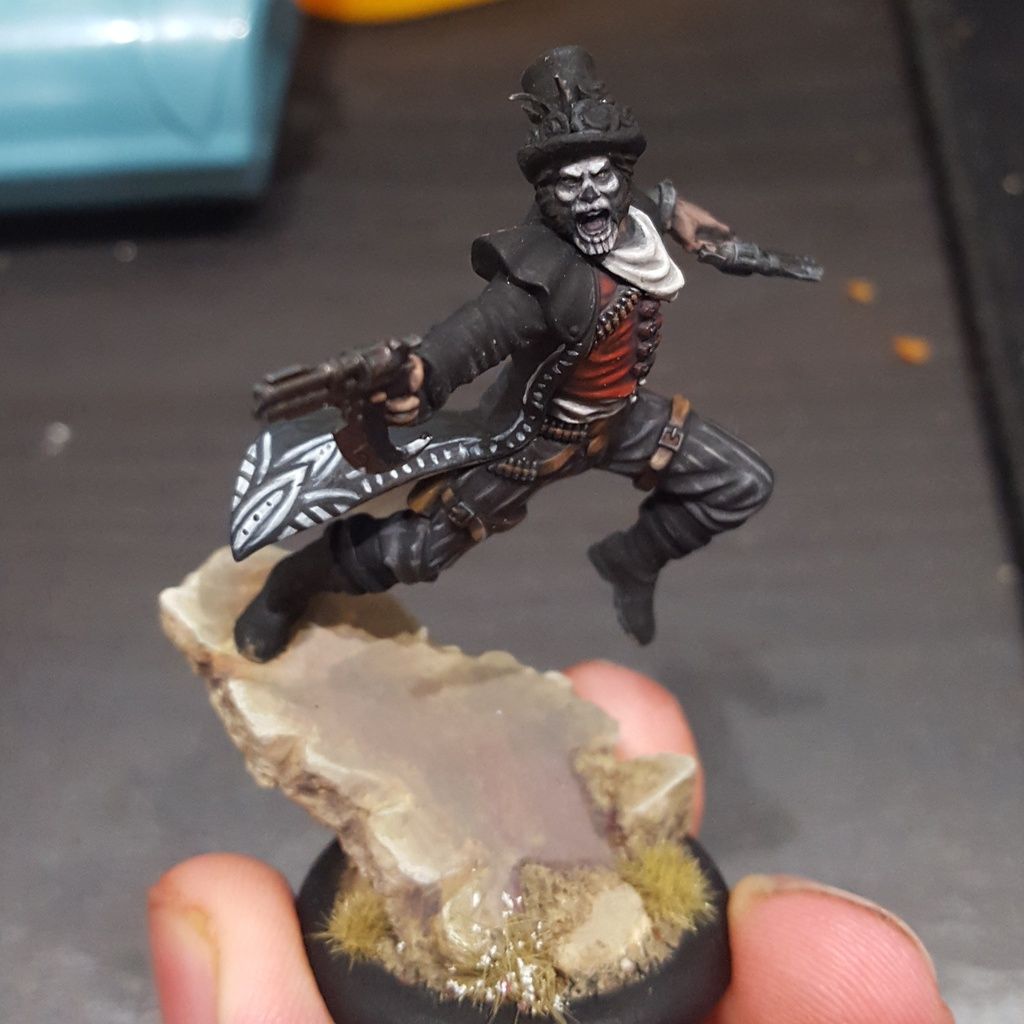
And I'm pleased to say that I've finally started some painting on my Santiago. Love this figure and been trying out my new Scale 75 paints with him. Happy with is so far.
In his converted state:
With some early WIP paint:
Again, all is WIP at the moment but things are slowly coming together. The other crew members are starting to take shape but I try and post them up once there's something good to look at. I'm giving myself some deadlines so that hopefully by the end if the month we should be seeing some big things coming out.
As always C&C is more than welcome!
HD
-
13
-
Awesome figures, really love your paint style.
Out of interest, how much do you generally spend on your bases? Seems like you chop up a few models to make them.
HD
-
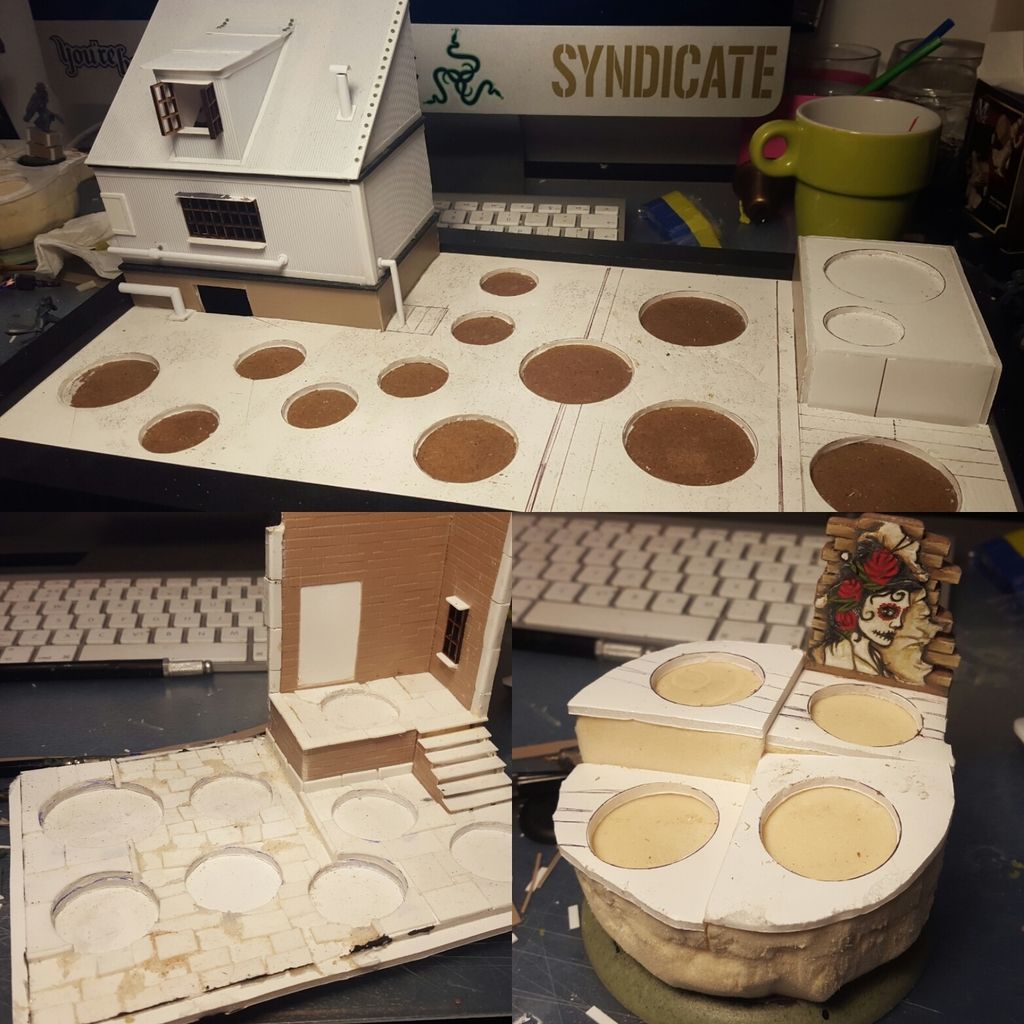
So I'm a big fan of display boards and really enjoy making them. I'm a regular tournie player and not being the greatest tactician I often go with the intention of running for the painting comps. For a display board designed for comp purposes I say go for 7-11 models, include your big models, your best painted, and any conversions you may have. But that's just my take on it. I always enjoy looking at display boards, no matter its purpose.
Here's the board I used last year for my Lucius Guild crew
A here's some WIP's of other (varying) boards/displays
HD
-
2
-
-
Definitely game for this again, really enjoyed the last one!
-
Very nice work all round, especially with that Francisco!
I'm working on converting him myself at the mo so this is some good inspiration
HD -
Definitely interested in this one. Out of interest what will the tweaks to proxy rules be? Just enquiring as Im currently modelling a conversion/sculpted heavy crew
Cheers
HD
-
Thanks for all the positive comments folks!
I've been away snowboarding last week so I'm only just getting back to my work bench but I do have a few WIP's of my next family member, Abuela!
So if you frequent A Wyrd Place on Facebook you may have seen this a while back. I basically decided that I'd scrap Abuela's wheelchair for a slightly more unusual mode of transport.....her own personal Executioner: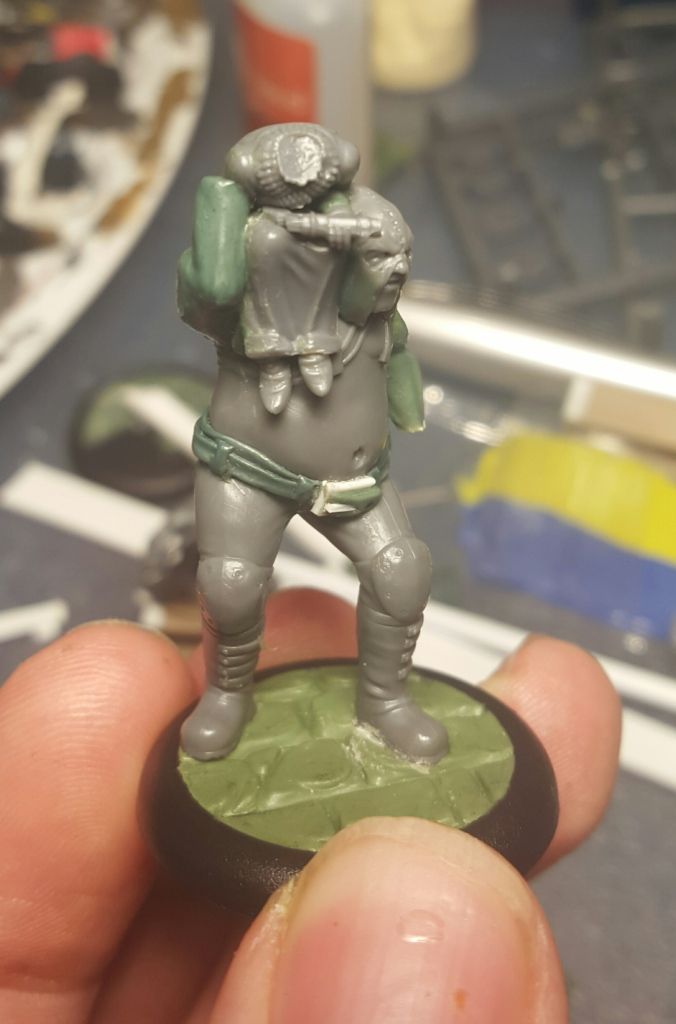
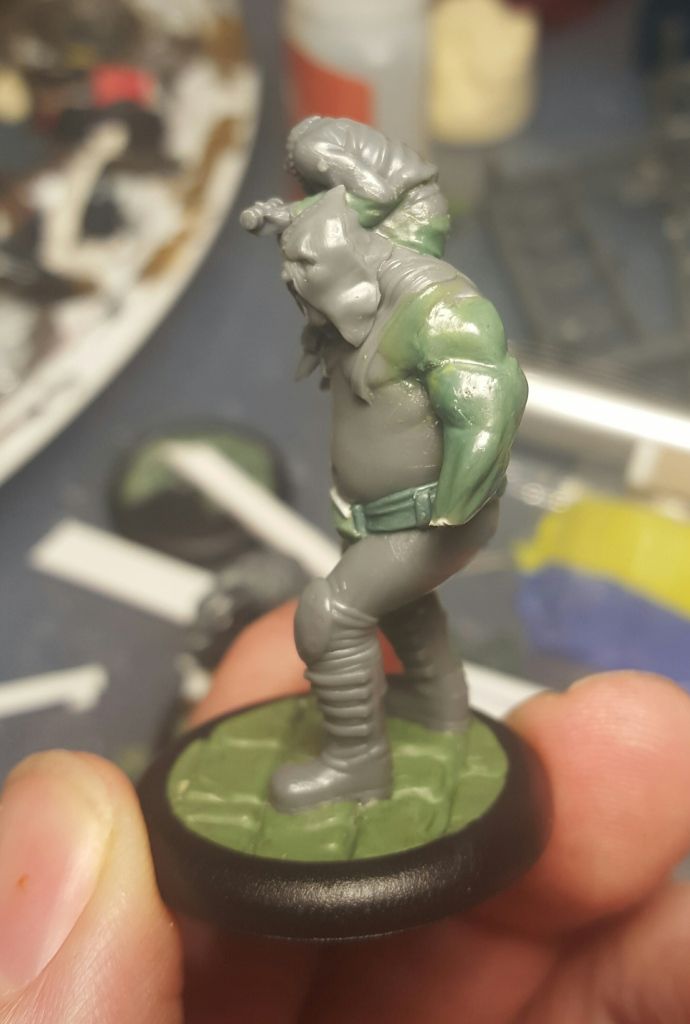
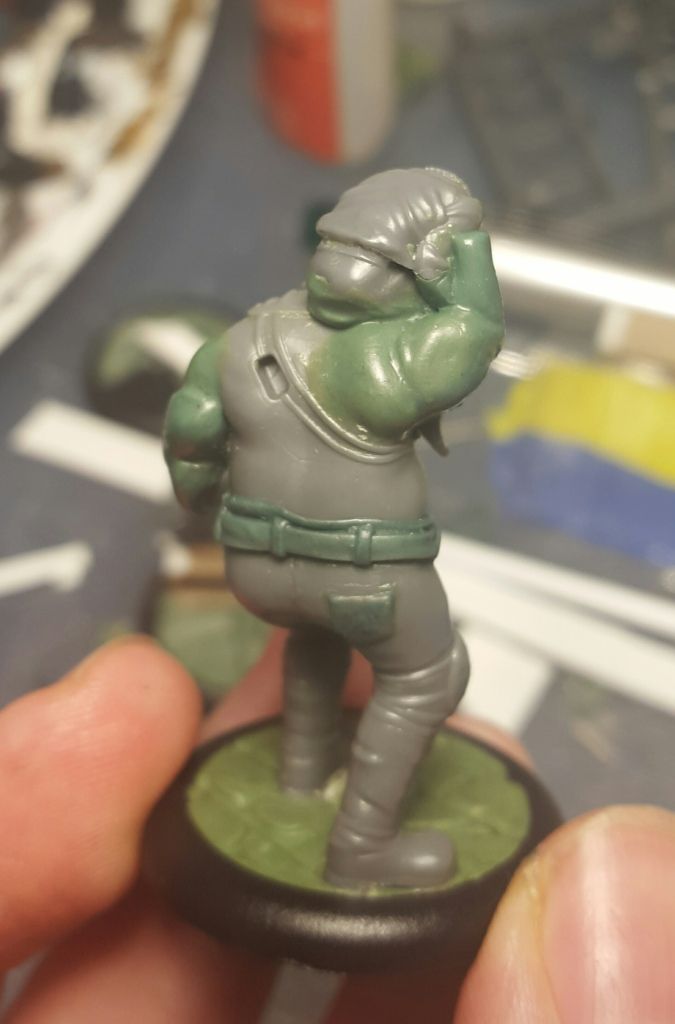
Apologies for the slight white glare to the pics, not the best quality. So this is kinda my first proper time sculpting arms and muscles. I'm pretty happy with how they're turning out so far. I have had a go at some hands but they are proving a lot harder to get right. I used Johan's arms as a reference when sculpting as he's a similar size to these big guys.
I try to keep my work bench full with several models at a time as I try to only sculpt small amounts at a time to avoid squashing my fingers into still setting green stuff. So throughout this project you might see many WIP's but I assure you they will all see completion. I expect to be tournament ready from end of March so I need to get cracking!
So, just a little update for now but much more to come over the weekend (we'll be meeting some more family members!).
As per, all C&C is greatly appreciated and any questions I'm more than happy to answer.
Cheers
HDP.S. @Math Mathonwy, I will be sorting out those suspenders. It's something I didn't notice until I was a good way into the conversion unfortunately.
-
6
-


Scottish GT 2016 - 23rd/24th July
in UK
Posted
I will be passing right by you so could sort something out though I've not fully decided on exact timings yet.
I might be looking to head up after work on the Friday to avoid been half dead through Saturday.