

snitchythedog
-
Posts
74 -
Joined
-
Last visited
Content Type
Articles
Profiles
Forums
Gallery
Events
Downloads
Posts posted by snitchythedog
-
-
17 hours ago, McLovinMcCheese said:
this site is amazing
He has some pretty good stuff. I have over thirty of his molds plus some others. Casting can be a bit addictive but does give nice results. If you are casting in resin then follow his instructions page to the letter since the resin can seriously degrade the mold. I forgot to add Keebler orcs gravestone mold.
He has some nice stiff too. I ordered from him last in 2013 so as far as I know he is still active.
Snitchy sends.
-
Hirst arts has this mold. Works in resin and has parts to make your obelisks. You just need to use a mold release since the resin can damage the silicone over time.
Spoiler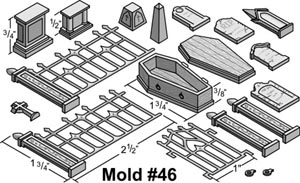
Just look for mold no 46. Building instructions.Head stones are smaller than rendera but will give you some variety. Fencing is nice but takes time to build up a lot of it.
I know there are others out there but it is a bit late here and I have to work tomorrow.
Snitchy sends.
-
 3
3
-
-
On 18/02/2016 at 6:21 AM, Omenbringer said:
What I would recommend is some dry craft moss like this:
I would second this. My only caveat would be to glaze the moss with superglue. It has a tendency to rot over time when it is exposed to humidity. To glaze pick up some very thin superglue and apply it to the moss. Then gently blow it around so the superglue impregnates all of the moss then let dry. This will both stiffen it up and protect the moss from moisture.
Hope that helps.
Snitchy sends.
-
42 minutes ago, Paddywhack said:
Did you scratch build the cacti? Just out of pink stuff?
It all looks great! I need to make some more.
They are made from Sculpture Block but it is not like any other foam that I ever saw in the states.
Spoiler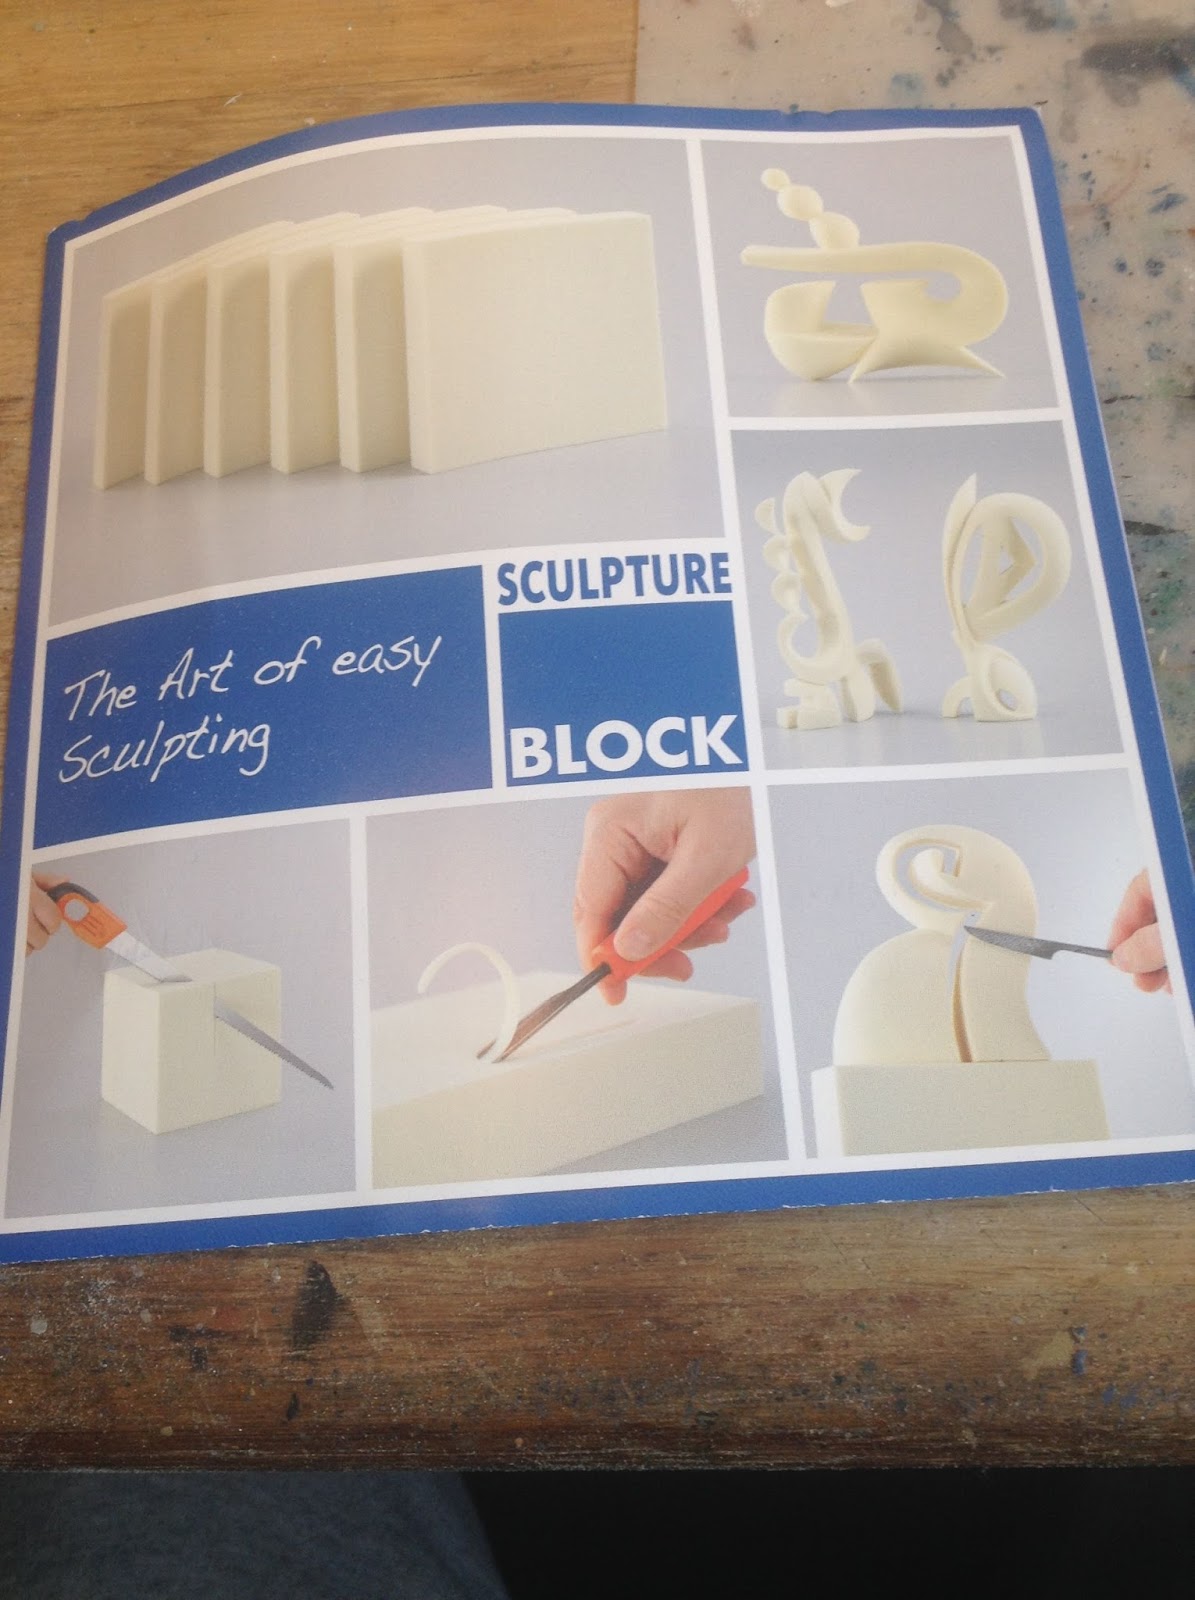
Initially it looks a lot like the green floral foam. Small microbeads and it is easy to work with and shape. The big difference is that it is structurally sound. It does not deform under pressure and it seems to be as strong as pink or blue foam. I also tested it out with several of the glues and paints that I had on my desk at the time. It does not react to superglue, liquid plastic cement, spray paint or mat sealer. A bit pricey but neat stuff all around. If you do get some just cut blocks to size, sand until they are round then use a triangular needle file or rasp for the ridges. I am happy with how they turned out since finding cactus models is difficult at best over here in the UK.
Snitchy sends.
-
1
-
-
14 minutes ago, Kaijuhandchop said:
Looking great , love the cactus. The caravan looks pretty cool. what model is that?
Thanks for the comps. That caravan was scratch built.
Spoiler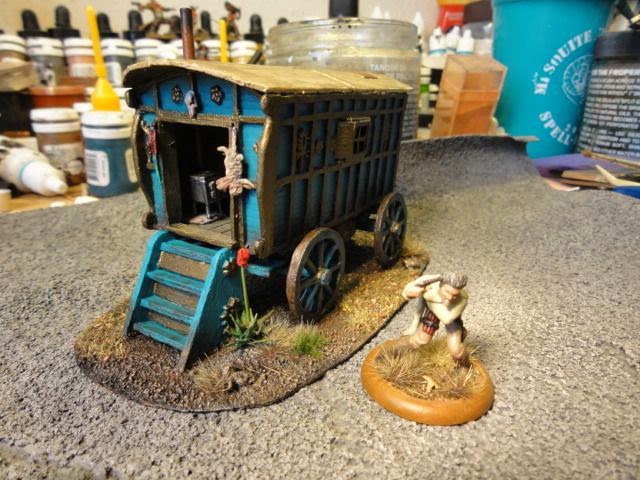 Spoiler
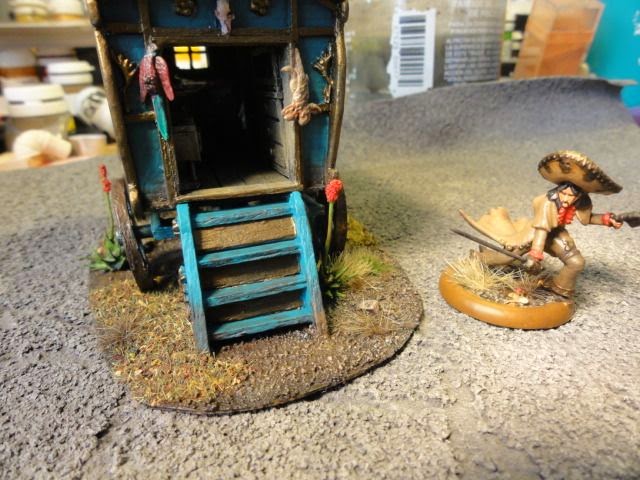
Blog entries for the build.
Honestly it has too much detail becasue the interior is not visible but there you go.
Snitchy sends.
-
1
-
-
Just showing off some newly finished badlands terrain.
Spoiler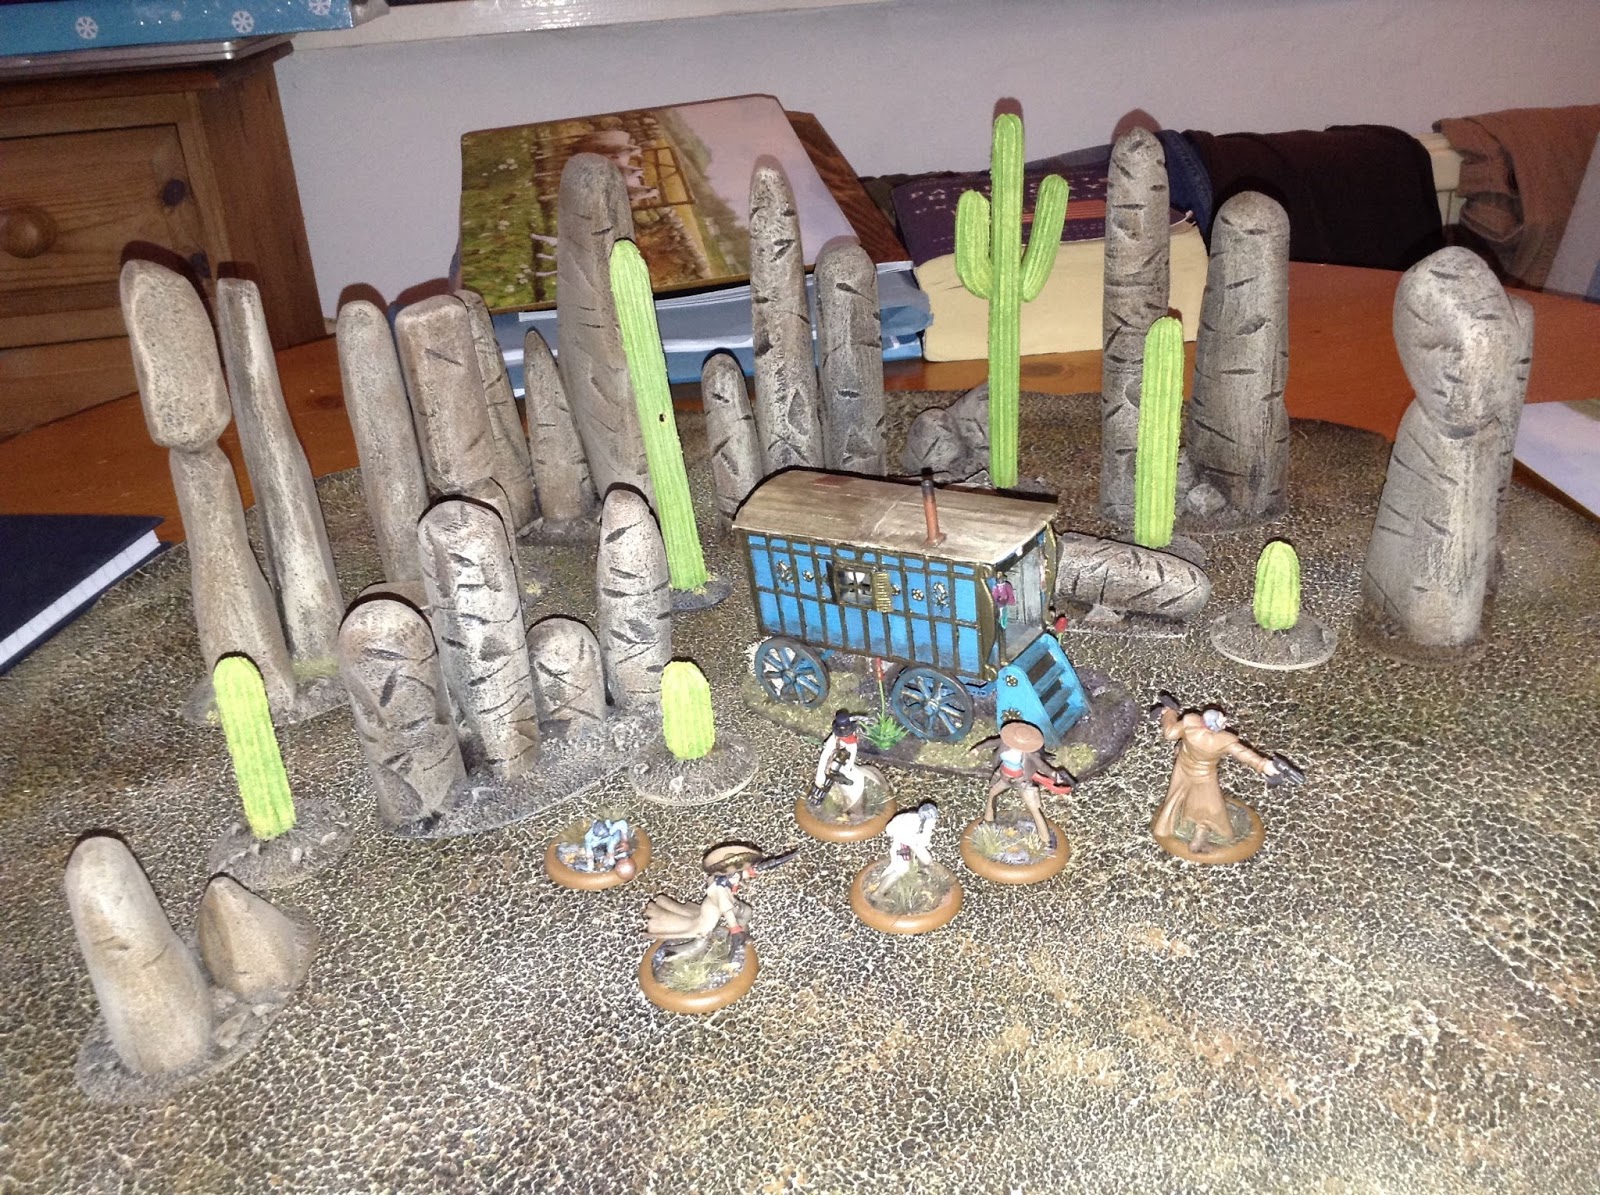 Spoiler
 Spoiler
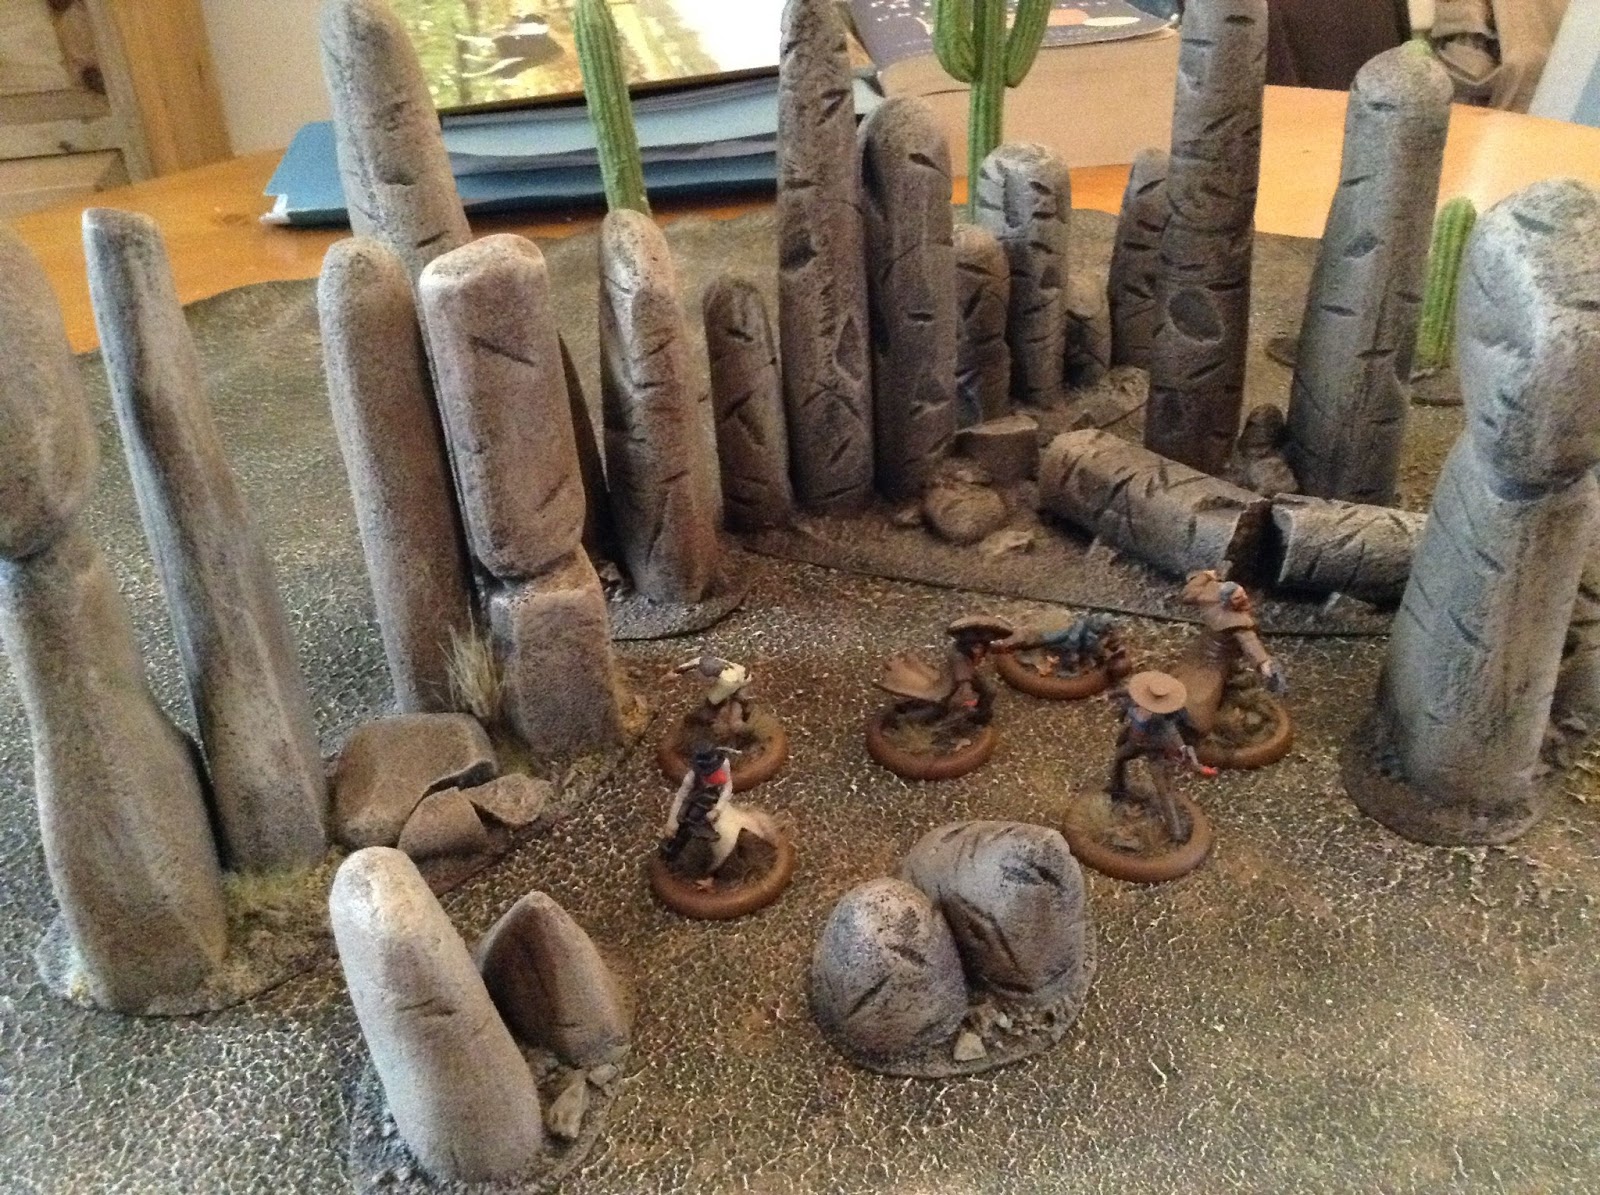 Spoiler
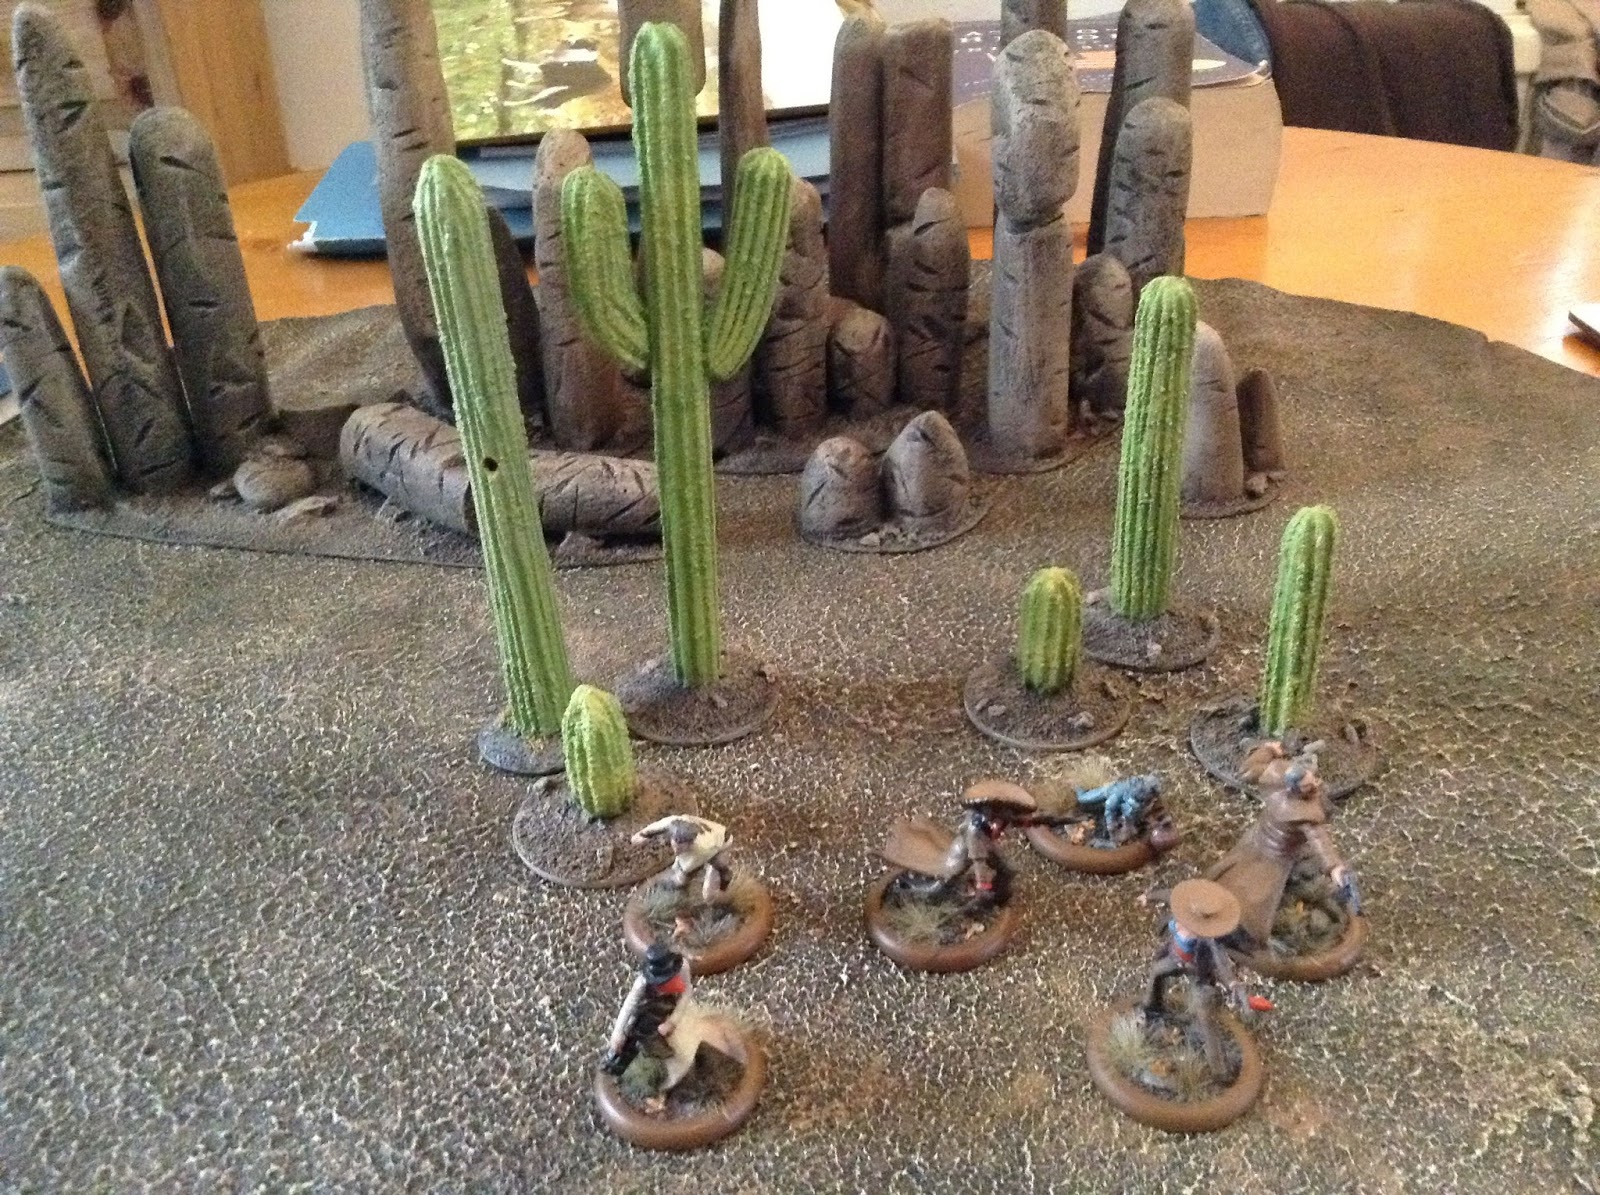
Hope you like.
Snitchy sends.
-
2
-
-
On 09/02/2016 at 2:08 AM, SpiralngCadavr said:
sorry, snitchy, but duct tape (reflective, gummy, textured, tears poorly) seems like a terrible plan.
Just trying to give all options from low to high, both in terms of cost and skill level. Black duct tape would fall into the category for novice builders. Not my personal first option.
Afalas, glad the suggestions helped.
Snitchy sends.
-
Very nice board. Well thought out and executed.
On 06/02/2016 at 0:13 PM, MR TORGUE said:absolutely beautiful board. What did you use for the river effect. I have a plan for my own board this year and you've certainly given me food for thought
 Spoiler
From the edge of the water in this image it looks like he used Envirotex Lite or something similar. It is a resin used to cover tabletops with a clear surface. It is available over here on Amazon and not prohibitively expensive. A good tutorial for doing the water is provided by Hirst Arts.
LinkeyJust remember to pour it in thin layers. That allows you to build up the depth and gives an even surface. If you pour thick it will develop a visible concave meniscus.
Hope that helps.
Snitchy sends.
-
If you look at this image:
Spoiler
It looks like he paneled the sides and painted them. You have a couple of options depending on skill level and resources. Easiest and cheapest is black duct tape. It does not look the greatest but it works. Next up is mat board. This is the colored board that is used as the edging of picture frames. Plastic card is another option that is readily available. That might be what the artist did for the above diorama becasue you can see an edge line for the panels on the right side of the river. For a really solid edge you can also look at laminate counter top. It is a pain to work with but it will give you a solid permanent edge that is very clean in its appearance. Solid wood edging is another option. Just a couple of suggestions. The big thing is to plan out what your edges are going to look like when you start the design process for your base. It is much easier to design it in rather than add it on later. Hope that helps.
Snitchy sends.
-
1
-
-
Christmas trains. They come with plenty of track, several cars and are cheap. This time of year they should be fairly easy to find.

They are at a slightly reduced scale, but on a Malifaux board it should not matter.
Snitchy sends.
-
Nice work. Well thought out and useful.
Snitchy sends.
-
6 hours ago, Fetid Strumpet said:
It looks slightly off in scale though, the terrain is 28mm, and isn't Malifaux 32mm?
Scale is relative in war gaming terms. Ninety percent of the weapons are over scaled on the model to give a visual representation. Especially the swords and pistols. Same in most cases with hands, breasts, pouches, tools and muscles. If the building does not have an interior that is playable I prefer a reduced scale so it does not take away gaming area so these would work for me. My only issue with the link provided is that the buildings are a bit rich for my tastes. If you can afford it great but these exceed my budget for fun stuff. If they are in anyone eases budget I would not try to dissuade them from a purchase.
Snitchy sends.
-
Very cool resource. Many thanks .
Snitchy sends,
-
My suggestion might be a little counter intuitive. All of the methods above will produce cattails. My problem is scaling. The cattails that you create with paper will have very large leaves when scaled next to a model. My suggestion is to make the head of the cattail as you did before and then to use field grass from woodland scenics for the leaves. Linkey My two cents on cattails. Hope that gives you another option.
Snitchy sends.
-
Just so you have a good cross reference for scale.
http://theminiaturespage.com/ref/scales.html
O scale will be a touch too large. American S scale is more correct but that limits what is available even more since it is an odd scale to use.
Hope the link helps everyone when figuring this stuff out.
Snitchy sends.
-
1
-
-
This project is on hold at the mo. Getting ready to start a new job and all that entails.
Snitchy sends.
-
1
-
-
Real life usually interrupts my thought process.
I started on the floor. Cast in hirst arts tiles. I glue them together face down to create a level surface. Then the back is reinforced with more glue and putty. When it is completely set I filled all gaps on the top surface.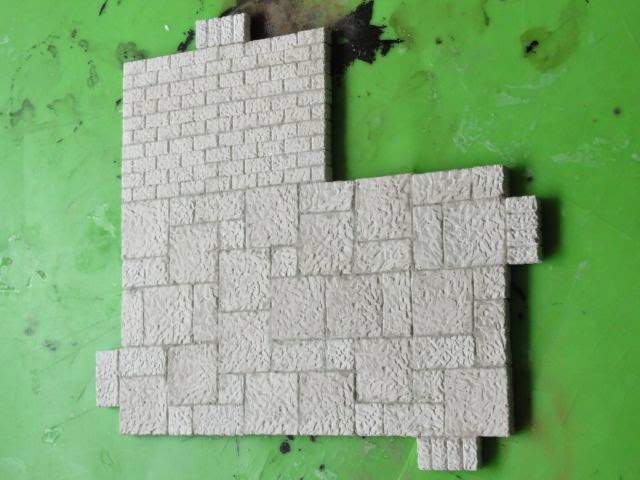
Then I built up the walls. I edged the bottoms and sides with Hirst blocks and added rough panels to fill the walls. Windows were added in and shimmed into place using coffee stirrers. The walls were then capped and doors framed with popsicle sticks.
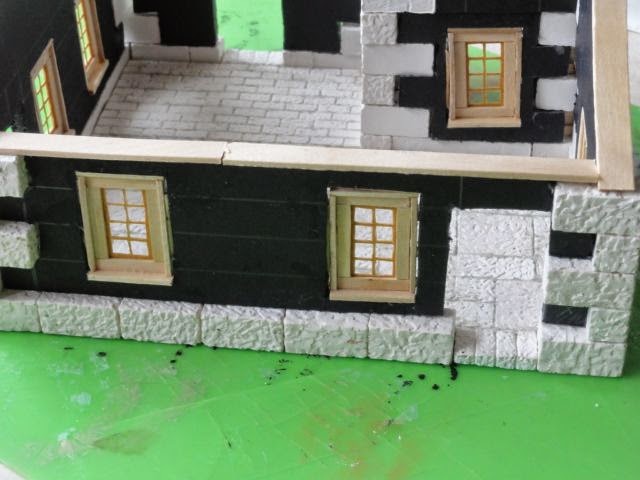
Gaps were then filled with more coffee stirrers.
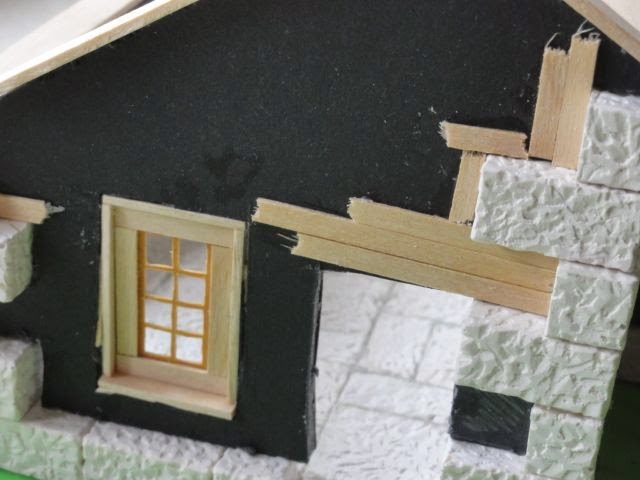
When these had set I glued the entire surface of the wall and covered it with cheap clay kitty litter. Then super glue was dribbled over all the kitty litter to protect it with a hard acrylic surface and to bond it in place. This will give me a surface similar to flint nodules.

Now to finish up.
Hope you like.
Snitchy sends.
-
5
-
-
Very slick Scarab. Nice job and definitely it looks the biz.
Snitchy sends.
-
1
-
-
I figured that I would show my step by step process for constructing scale buildings. This building will be fairly generic since I play multiple genera.
I start by prefabricating the windows. That way they can be installed immediately and do not slow down the rest of the building process.
They are based on stencil paper with the individual panes cut out. The paper is fairly tough and easy to cut. The front and back of the paper was faced with thin coffee stirrers. The outside edge was framed with larger coffee stirrers and a Popsicle stick as the sill. This will give the windows fairly realistic visual layers. All twelve windows took only about three hours to do. All gaps will be filled in once they are in place. Hope you like .
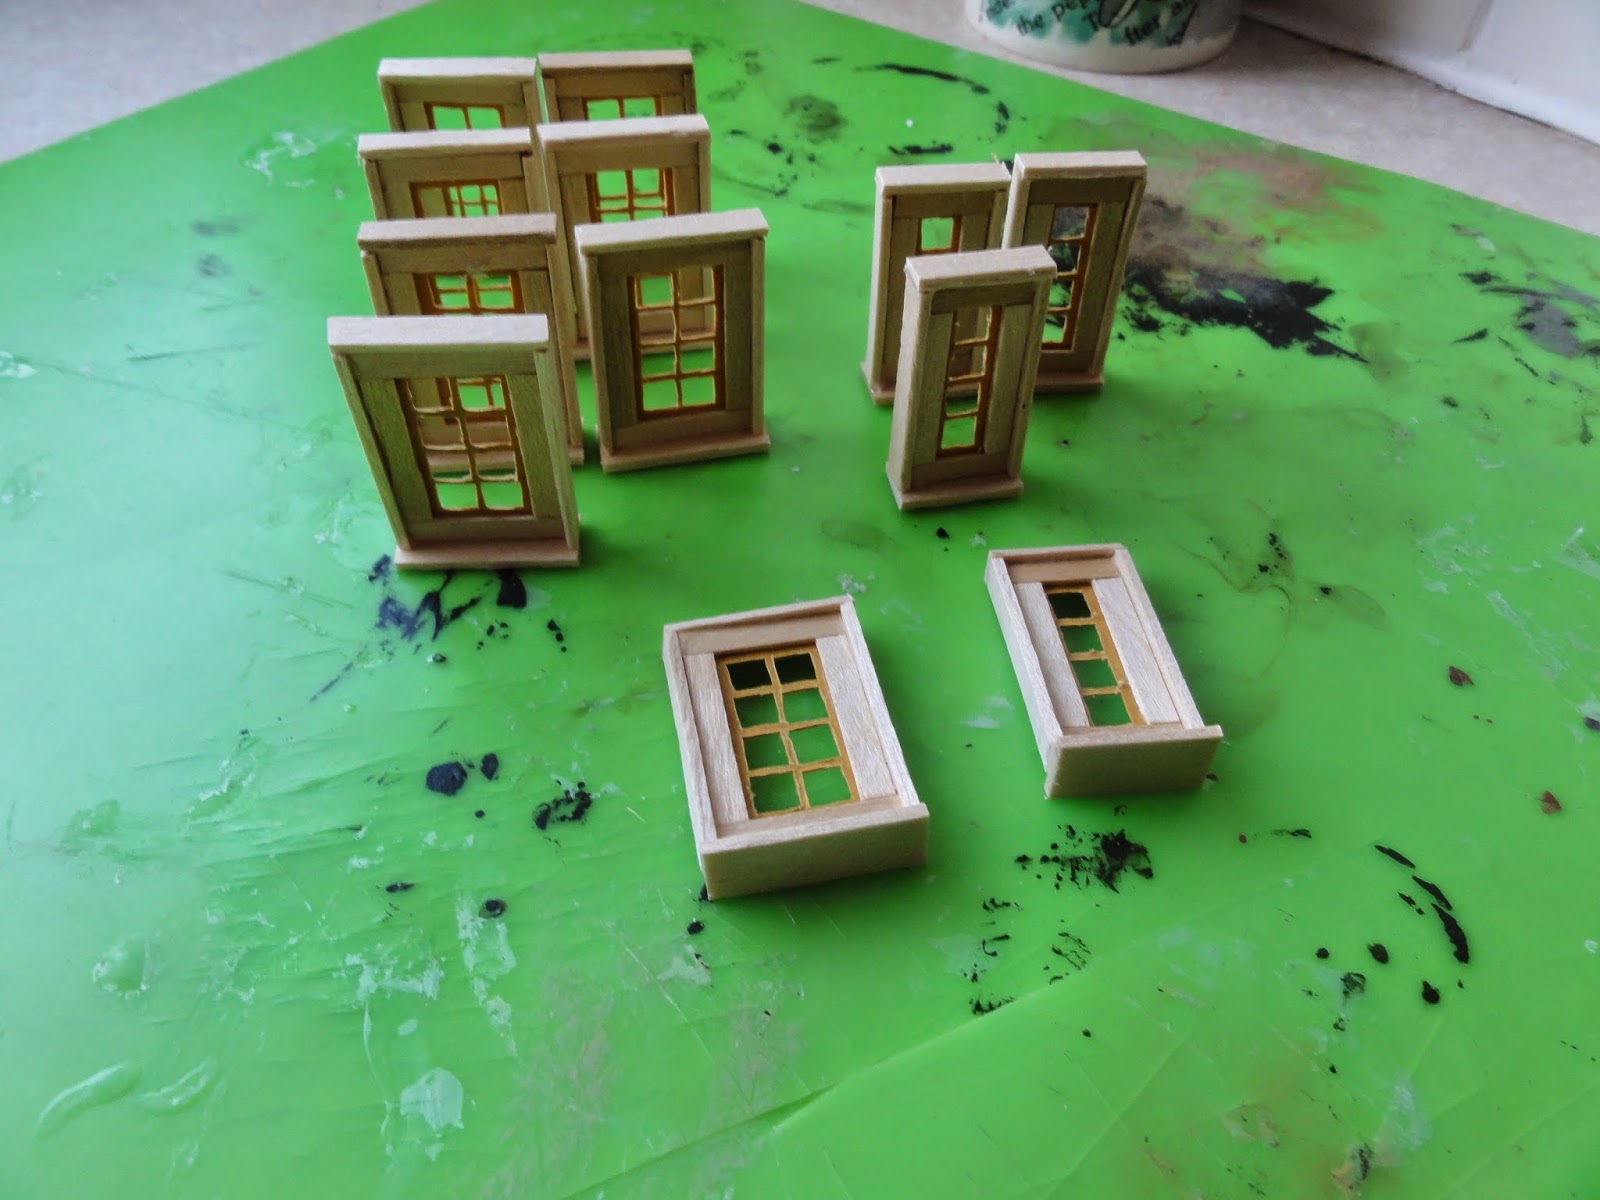
Snitchy sends.
-
5
-
-
Very well executed. Bravo.
Snitchy sends.
-
Looks amazing!
Where is that model from might I ask?
It looks like he scratchbuilt the building body and used parts from at least three GW kits that I can see. Well executed by the way. It will look good on your table.
Snitchy sends. -
Thanks! Swamp foliage to block LoS is a good idea -- any ideas or suggestions on what it could/should look like? Tall swamp grass, maybe, maybe could use some bamboo-style pieces for that? Other thoughts?
Nice modular build. For vegitation, most swamps have lots of trees. Many growing right out of the water so that would be a good place to start. Google swamp images and you should get some good hits.
Snitchy sends.
-
Pretty impressive.
Snitchy sends.
-
Good suggestion: I shall look into how to do it! I want each floor to be exchangeable with others, allowing for a nice mix of constructs, so that does dictate where the connectors must be, but I am sure I can make it more inconspicuous.
You have hidden the tabs already behind multiple layers of the facade. For me the visually unappealing part is when the top is off. I tend to do highly detailed interiors on builds so the top is off much of the time. Again if that is my only gripe then it is a small one.
Snitchy sends.

Some new terrain
in Terrain Talk
Posted
Last few weeks I have been concentrating on terrain. Mostly since I just received a package of goodness from 4 Ground. First up is their forest bases. These are just two layer bases that have 60mm inserts to mount trees on. The nice thing is that if you order their 60mm bases you can use the bases for both forest and rough terrain by creating both types of inserts. Here are the photos. I have mounted all scratch built trees and dental plaster cast stones.
Next up is two 4 Ground wagons. Prior to this I have never built a MDF kit before. These went together quickly and were surprisingly good looking.
I also built four bases of zig zag or snake fencing. These were made from fireplace matchsticks. pretty quick and easy.
Lastly is a simple hill. It is 1/2 inch foam. I scored the edges to simulate rock and then added sand and kitty litter for texture.
Here are two glamor shots with some of my rock spires and corn fields.
I still have to add flock, static grass and to felt the underside of the bases before they are done.
Hope you like.
Snitchy sends.