

Antiquitas
-
Posts
156 -
Joined
-
Last visited
Content Type
Articles
Profiles
Forums
Gallery
Events
Downloads
Posts posted by Antiquitas
-
-
Thank you for the info and hints.
I will press on and see what happens.
Cheers
-
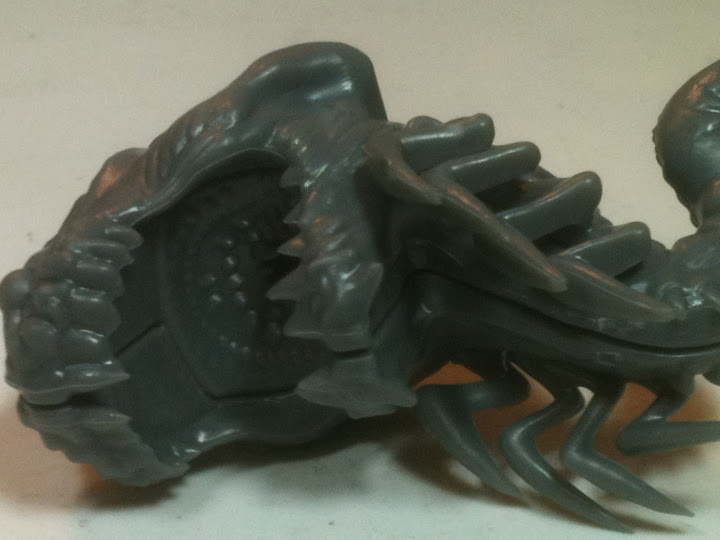
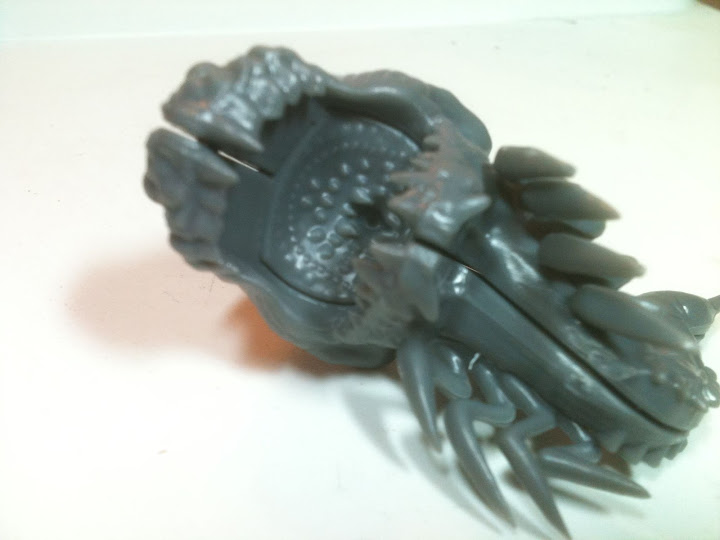
Can anyone tell me if this model is from the poor quality batch or is this the definition expected.
I haven't glued it yet so the seam will pull together more but it is going to need some green-stuffing.
The box pictures show sharp individual teeth on the top jaw, these are a solid line except for the two front ones.
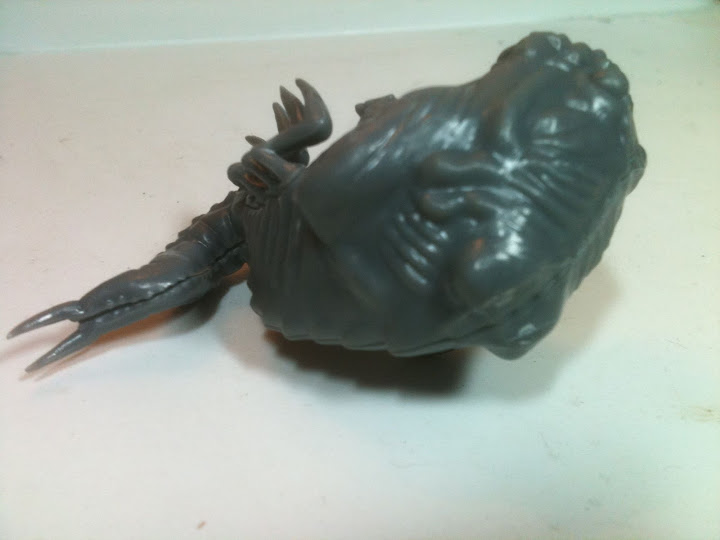
The teeth at the back of the mouth are also poorly defined and rounded. Also there are no markings on the belly either.
The general impression is that is bloated.
I don't want to start painting in case it has to go back.
I haven't unclipped any of the other figures yet either.


The plastic is a light grey, but my camera likes to change the colours.
I love the model pic on the box, but...
Thank you
-
First of all Welcome Ace Apex!
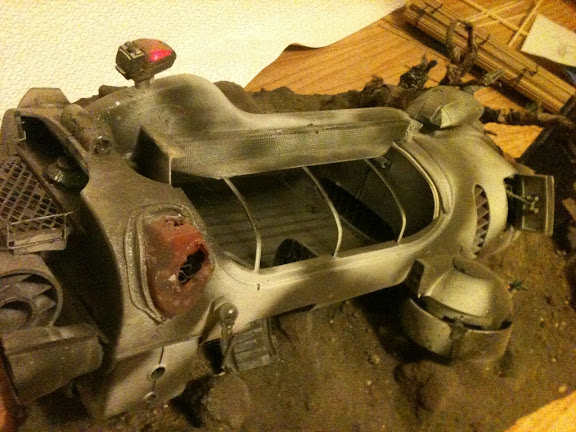
I love to 'recycle' when making terrain, but probably the most unusual item I have used so far was a Electrolux 12V battery hoover to make a crashed shuttlecraft.
I added some computer fans, a plastic coathanger, a couple of grease nipples, some Triang O gauge rails some wire mesh, grill etc.
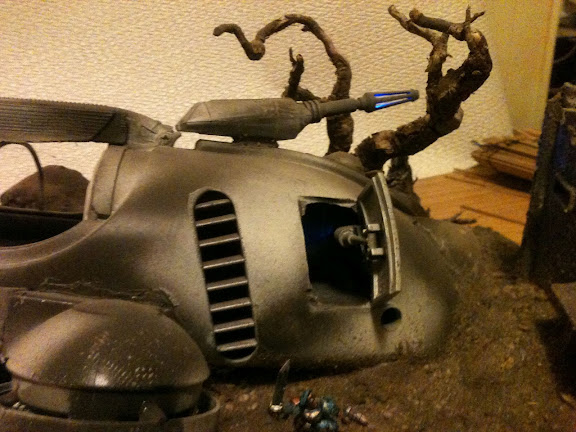
I put flashing LEDs in the engine room, the top light, the lasergun and the the damaged side window. The vertical thruster contains a working computer fan and the original hoover motor still works and blows air out of the side vents!
The switches are concealed in the shattered pipework of the derelict building.
The battery pack (just below the damaged side observation port) is removable, but has a jack to take the battery charger so it can be recharged in place.
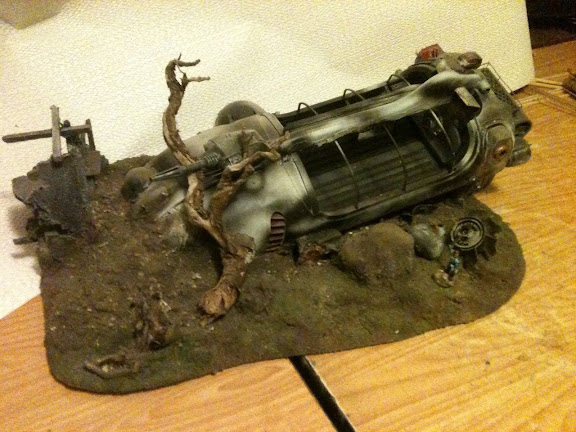
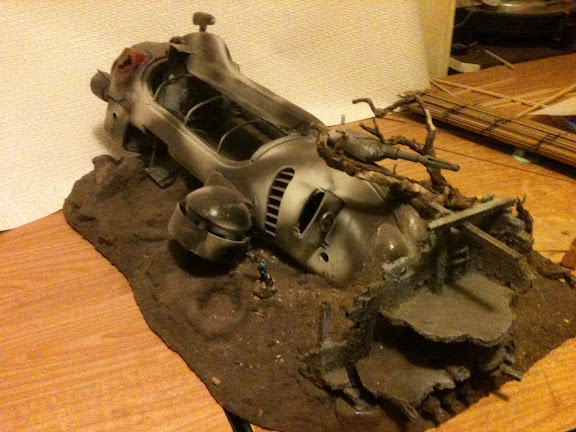

It was quite amusing during a tournament when the players discovered that there were switches!
-
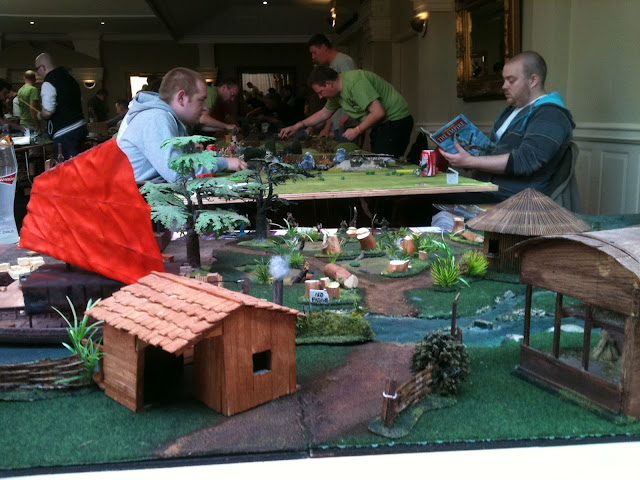
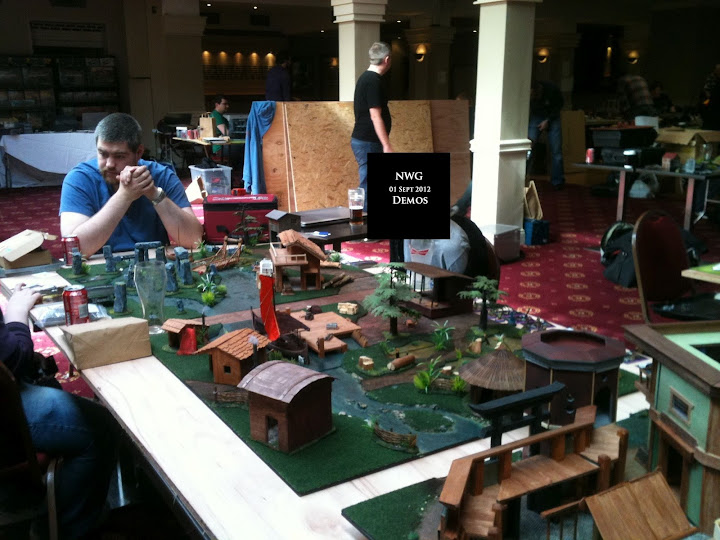
Demoing at NWG Wicklow
Had a great couple of days with Mike in Wicklow at NWG. Many thanks to Nigel, the event organiser, for making us so welcome!
We had a great response from the gamers, both on the boards and Malifaux and the figures we took with us, with players taking time between their 40K and Warhammer competition legs to try out the game.
We also ran demos on the Friday night, before the competition, and had some great games.
It was certainly worth all the effort to make up the boards for this event as it drew virtually everyone there over to us at some time during the day.
I gave out a load of hints on terrain building and I hope to see more people giving it a go and making up their own boards.
I didn't get a lot of time to take photos but Mike has a load more which he is going to post up later with a fuller account of the weekend.
A great success and certainly looking forward to going back there again.
So here's a few pics to go on with...

Now I have time to finish of the rest of the buildings and put in a few more details.
Already got some ideas for the next set of boards...
-
Great start to terrain building!
Although there are a lot of very good kits and pre-made buildings on the market, nothing beats making your own terrain. It can become an addictive part of the gaming hobby!
Looking forward to seeing a lot more.
A hint - if you have a fine tooth craft saw, heavily draw the saw sideways across the sticks and it will dig 'grain' lines into them. A woodstain or a wash coat will highlight them nicely.
Keep it up
Well done.
-
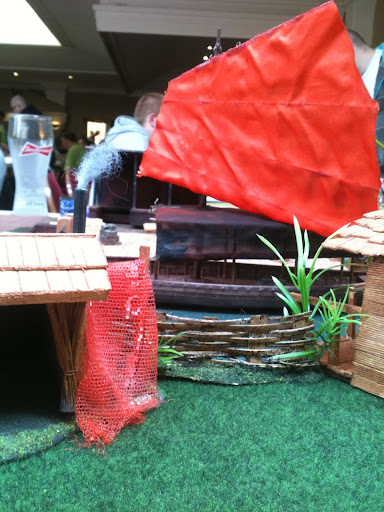
River Craft
Made up a 'Sampan' to go on the river.
I used a Revell Viking Longboat 1:50 scale and some heavy conversion work:
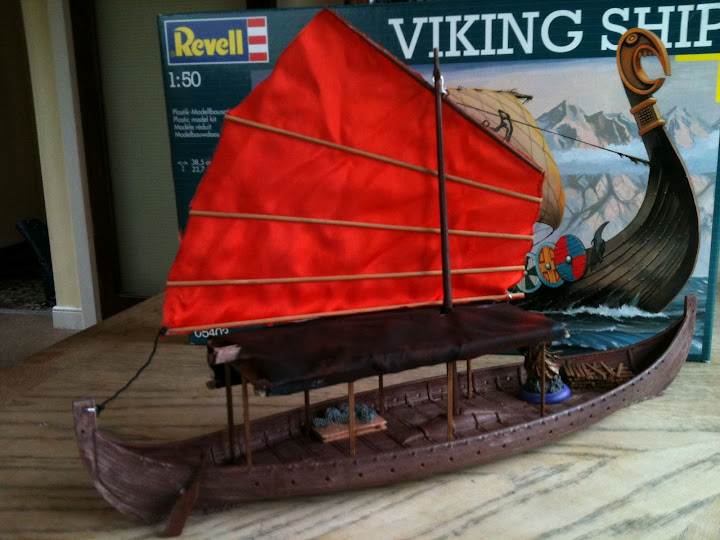
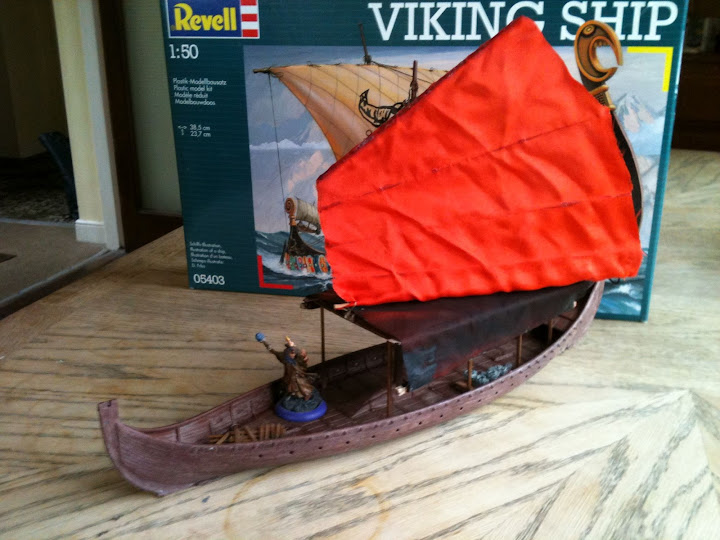
The canopy is glued in place and figures can go on top as well as underneath.
The Sampan will sit on the quayside and blocks line of site well.
-
Boxed - ready for tonight...
Well almost
Had a busy couple of days trying to finish off buildings and other stuff and got about 95% of the bits done.
Some of it is rough finished for playing tonight but finally ran out of time and energy.
Matt (eyeofthestorm) came over this evening and did a fantastic job on the sawbench and running gear while I pressed on.

I plan to take a load of decent quality photos when it is all set up for the gamers at NWG so I will post more on Sunday.
Now for some sleep....
-
Nice job! Looks great in both versions.
The watch towers are sweet and your shack is really neat.
-
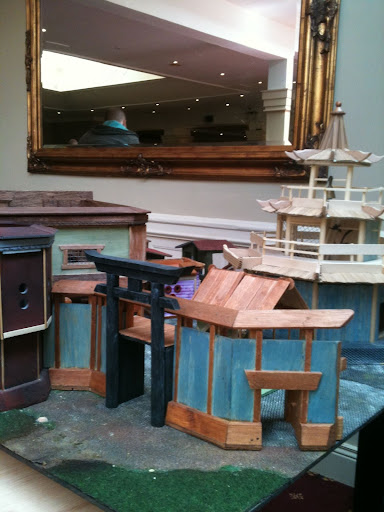
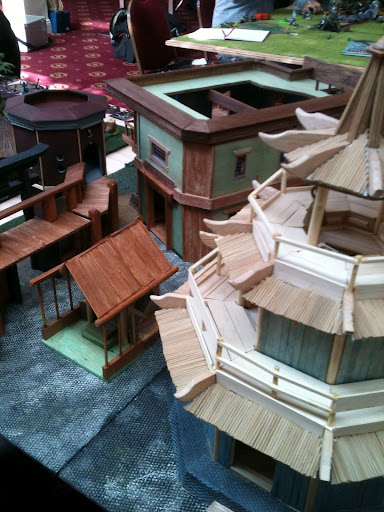
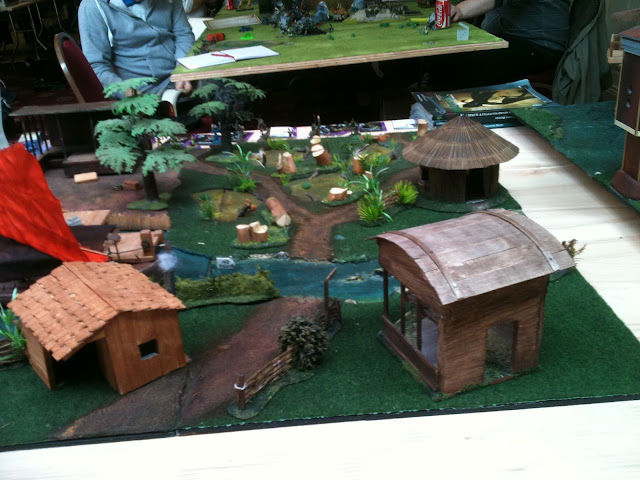
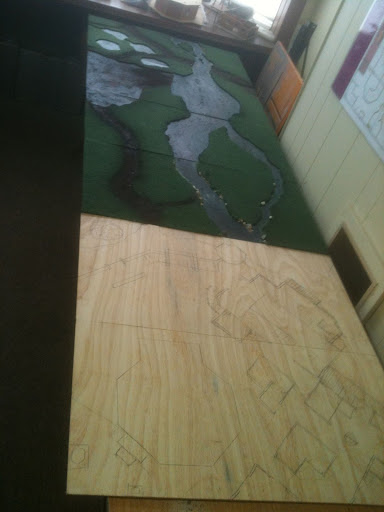
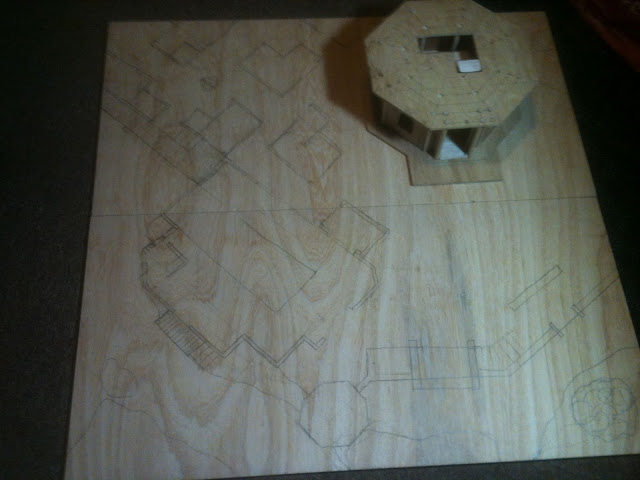
Progress Pics
The three boards together:
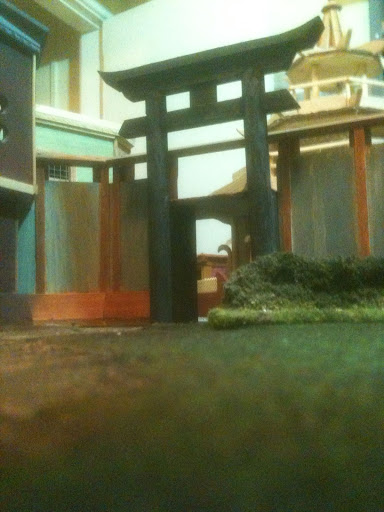
Entrance to the Forbidden City:
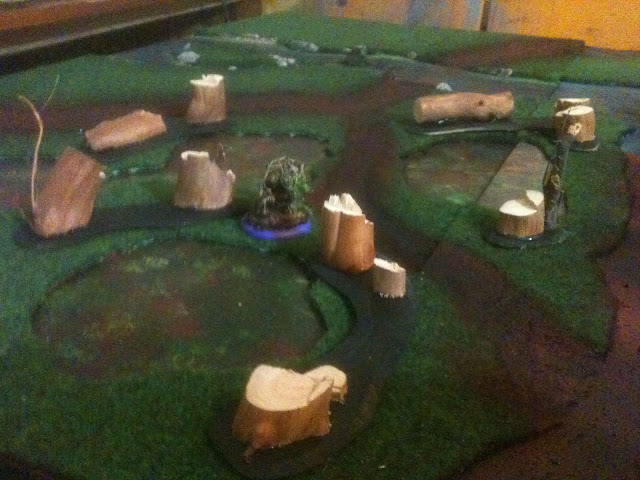
Stoned Henge
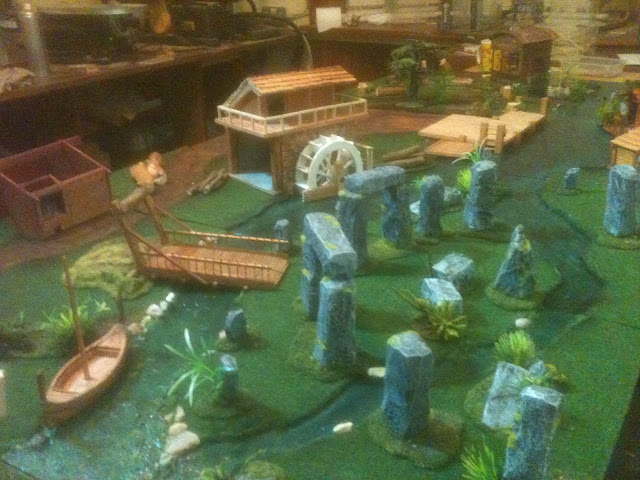
Up River
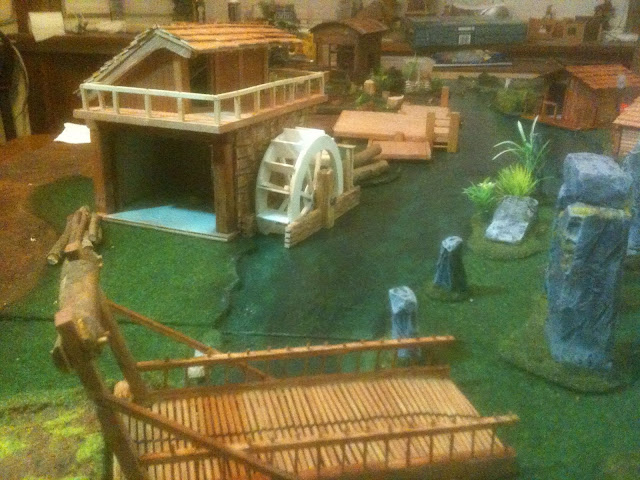
The Sawmill water wheel
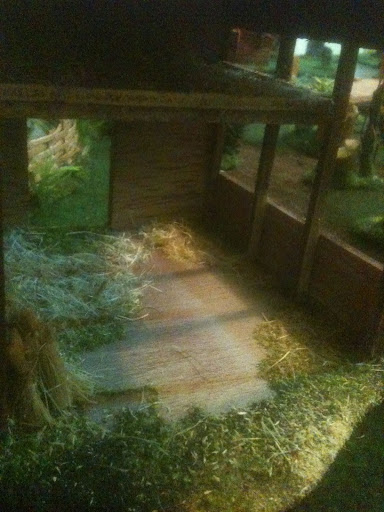
The Hay Barn

And finally Down river from the Paddock
Still lots to do before Friday so another late night tomorrow!
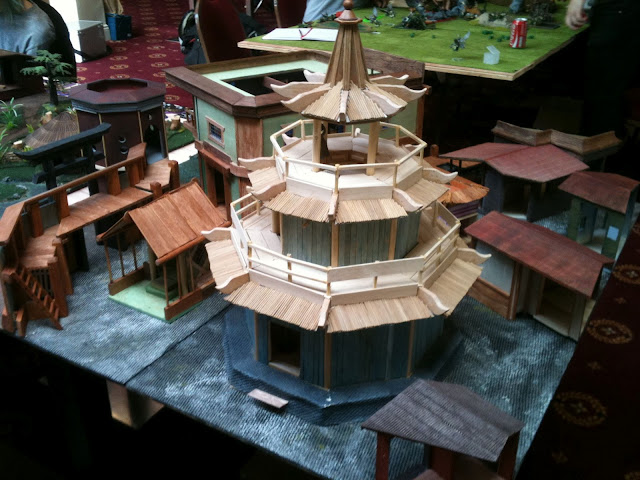
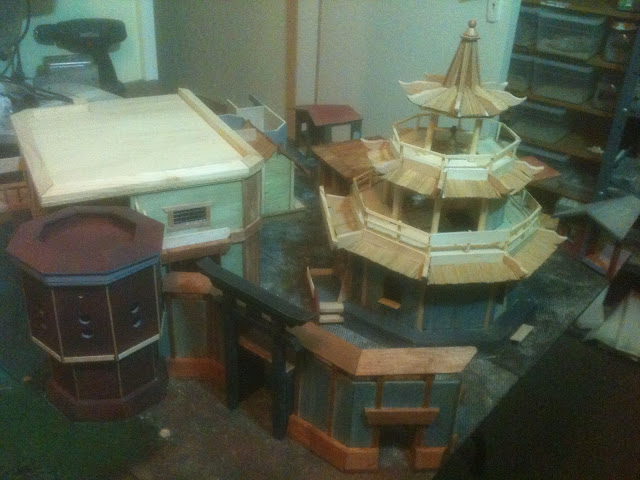
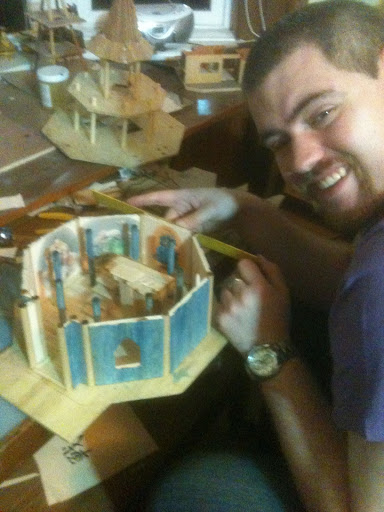
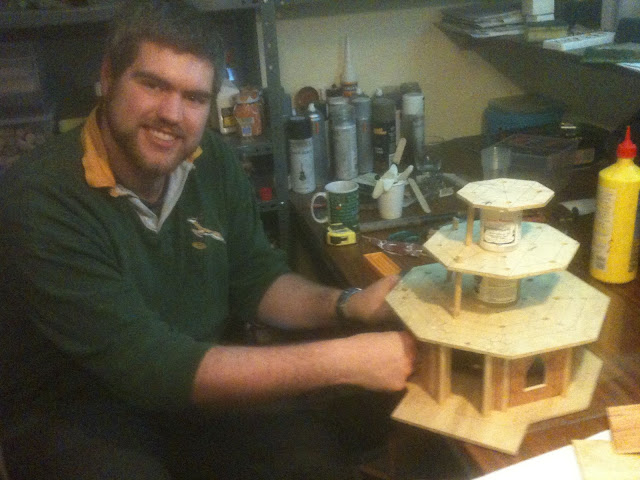
N.B. Mike has finished his Pagoda and it is truly AWESOME ! He also made another building for the 10T town. Definitely promoted to Master Builder.
-
Thank you
I'm having great fun with these boards and just letting our imaginations run riot
Looking forward to getting a load more done today as Mike is coming over to finish The Pagoda and bully me - oops - inspire me to get them finished in time.
Teamwork. :slap:
:-P
-
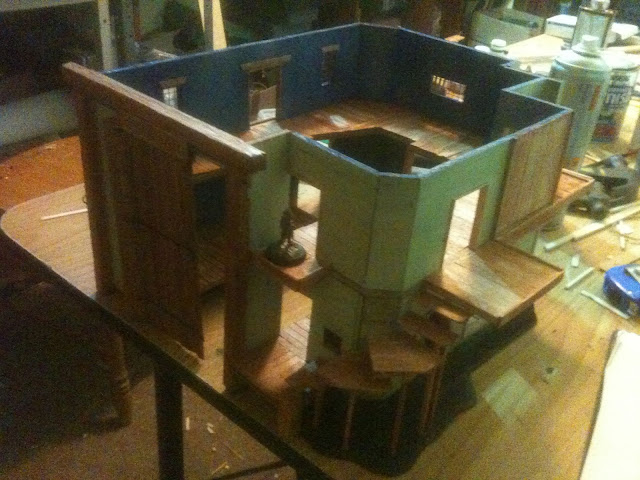
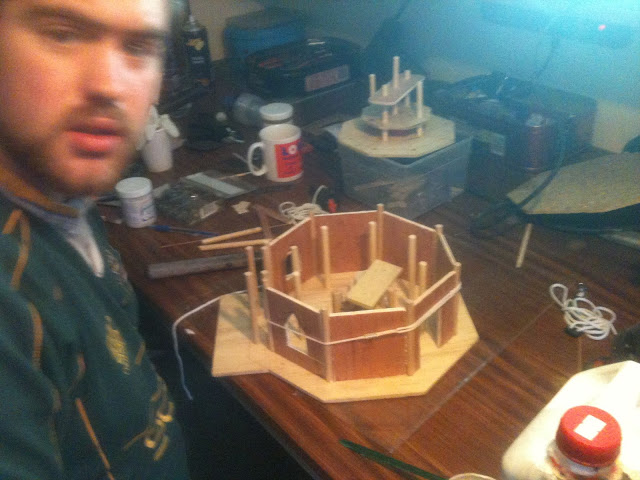
10T Warehouse - nearly ready for business!
Ten Thunders are opening the doors to their warehouse - even if it still hasn't got a roof yet. Von Schill etc are checking it out as my 10T's only received their orders today.

Who's been eating my noodles?

That's it for tonight as I want to start cutting out the roof sections.
Thanks
-
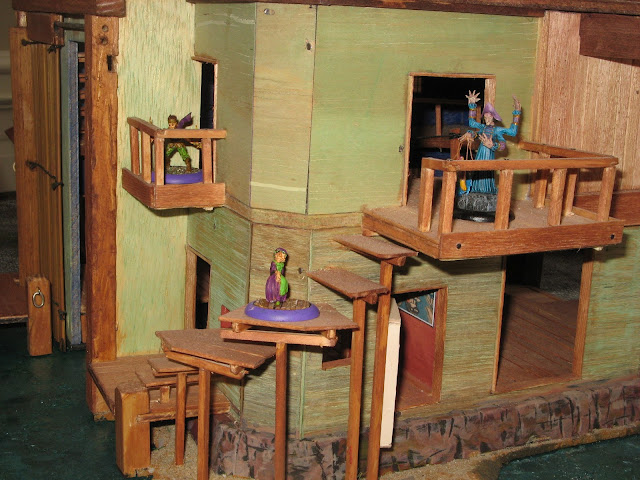
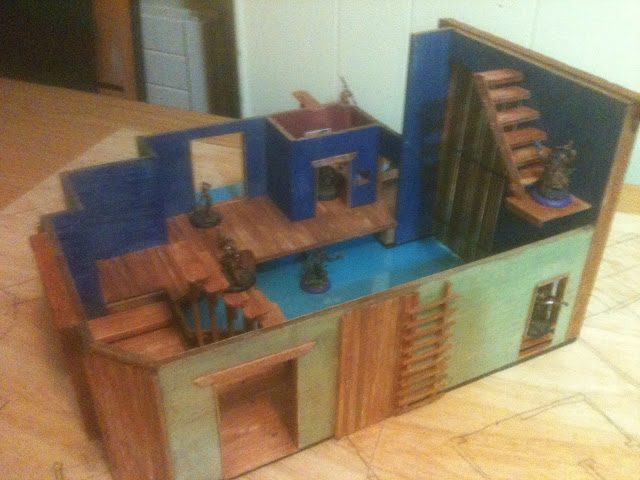
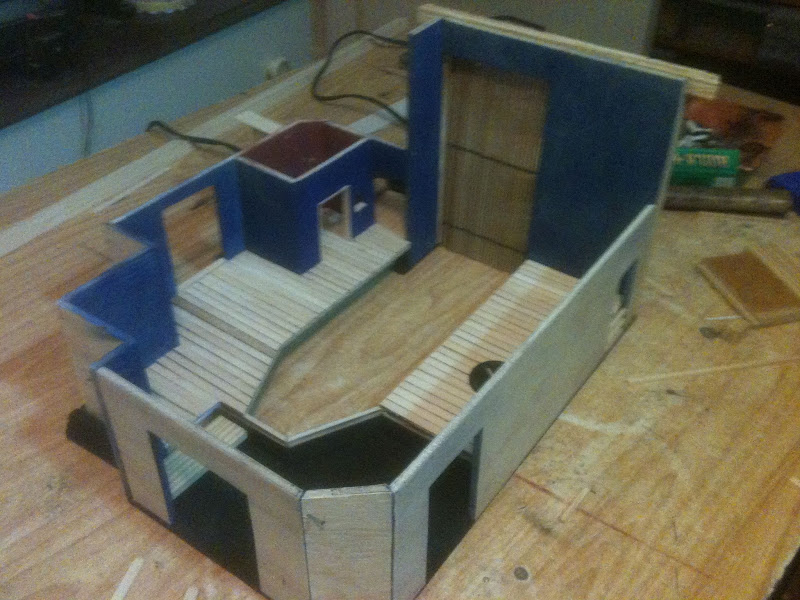
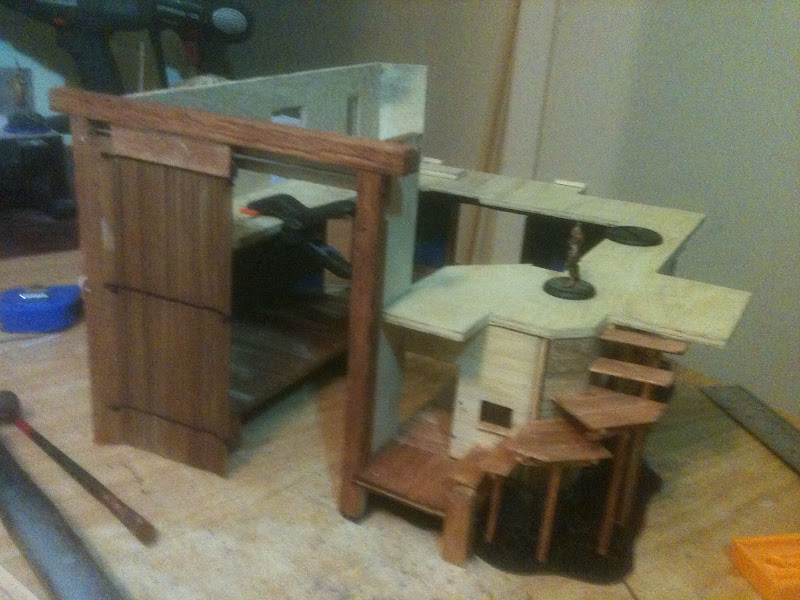
Just a quick update on tonight's progress on the warehouse...
Made the first floor section with it's balconies and laid down the floor boards. Unfortunately, half way through my box of 1000 coffee stirrers came to an end and the new box I ordered is a completely different size (2/3rds the width!), so I had to hunt round for any odds and end of the old style and mix and match them in. Luckily there were enough scraps that Mike and I had fired around the room (unintentionally - sometimes - while trimming them to size) to make it worthwhile. I will have to try and order a box of the original size tomorrow.
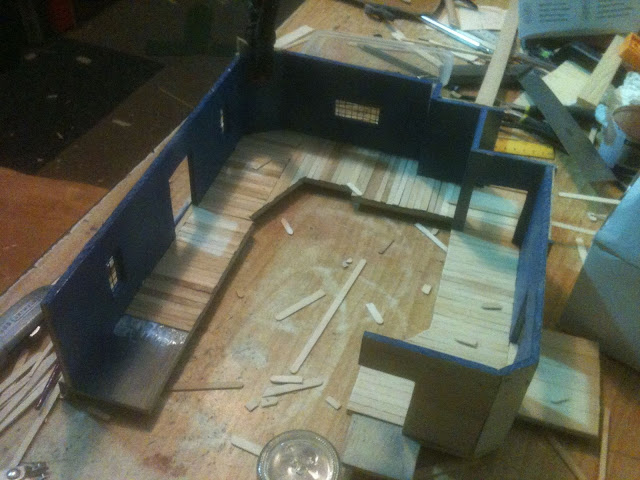
I have cut out some doors and windows and edged them and made sign for the front.
Finally for tonight I did a bit of detailing and staining.

Tomorrow night, hopefully, I will get the railings done and start on the roof section and the gambling den...
-
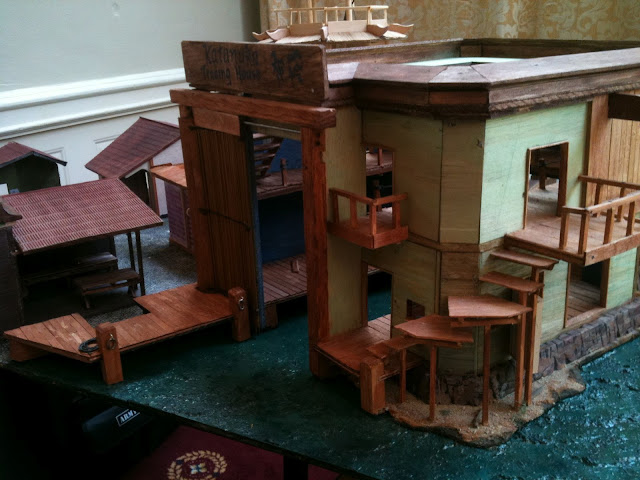
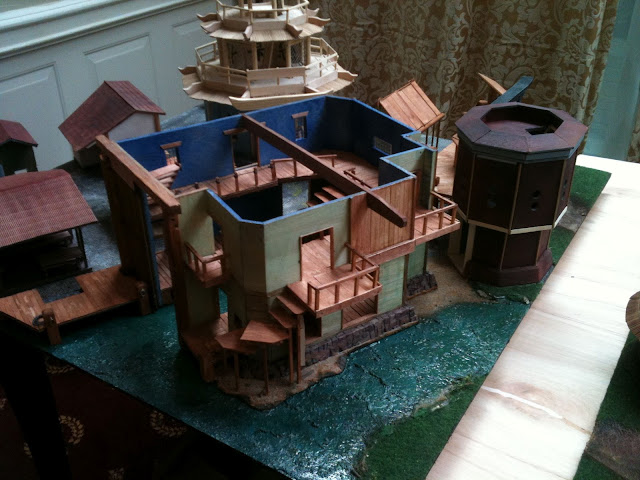
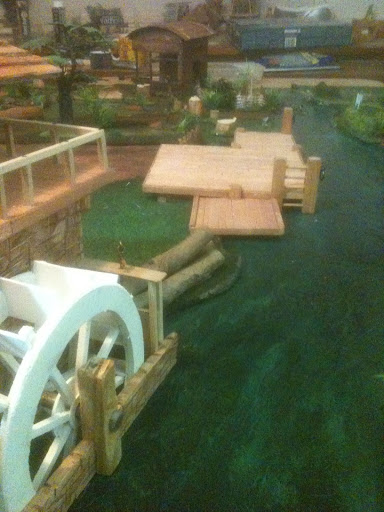
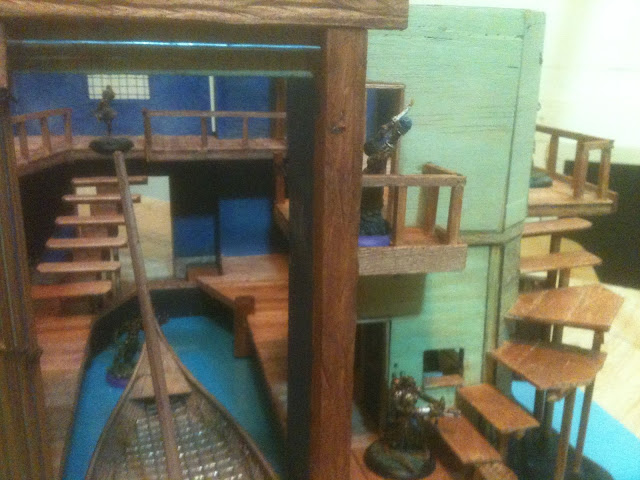
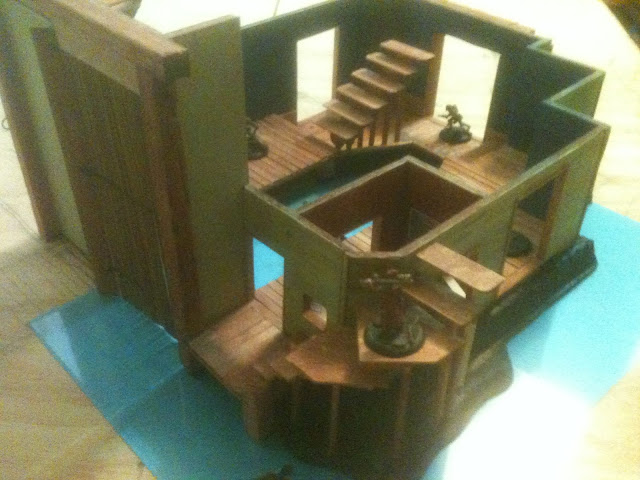
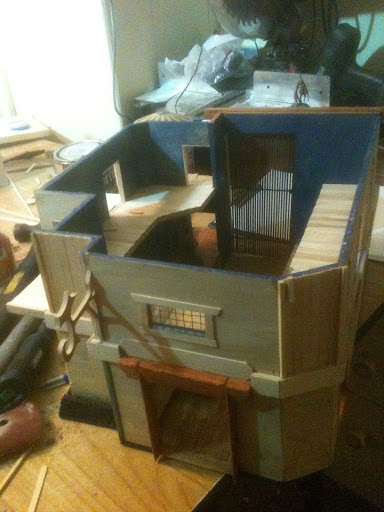
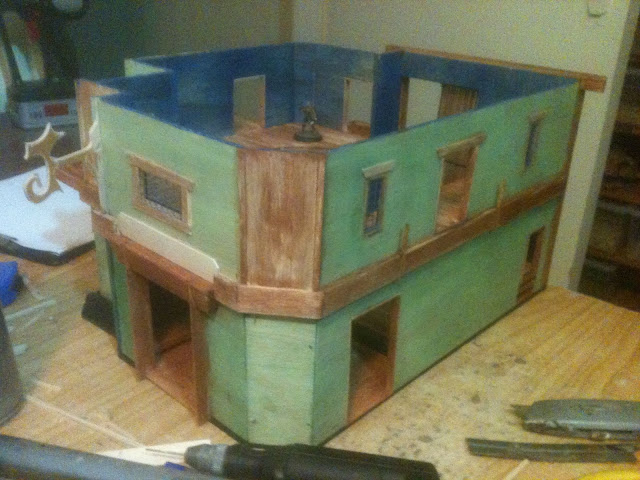
10 T Warehouse Dock
Working on the 10T's warehouse this weekend.
The idea was the 10T's wouldn't want prying eyes seeing 'contraband' cargoes so the boats are brought inside the warehouse to be unloaded, and bamboo hanging door can be closed once it is in.
There are stone sea walls around the base, and the warehouse and docks are built off them.
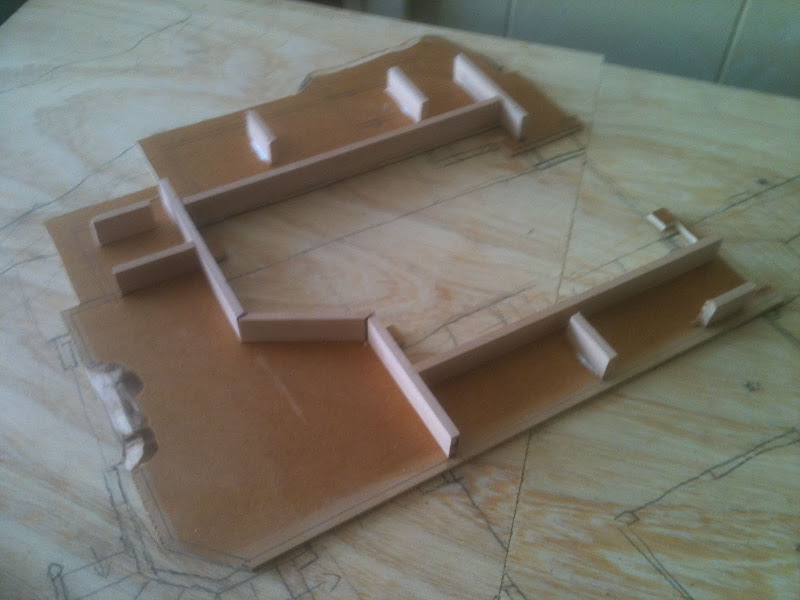
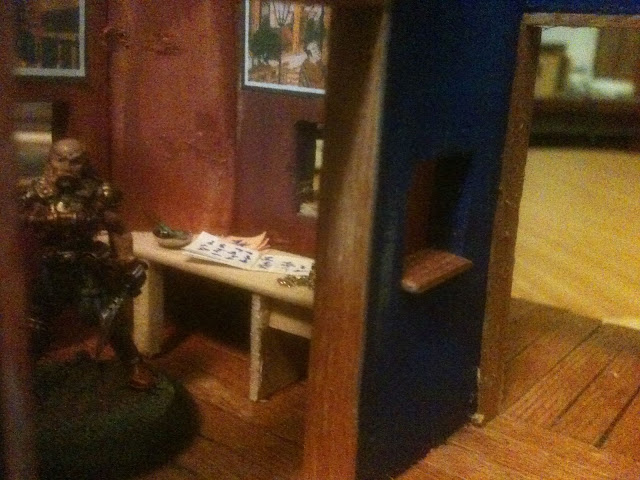
An office in the corner has views seawards and into the warehouse and is only accessible to 30mm bases. A small door leads to a jetty at the front and stairs up to a balcony and an access to the first floor area.
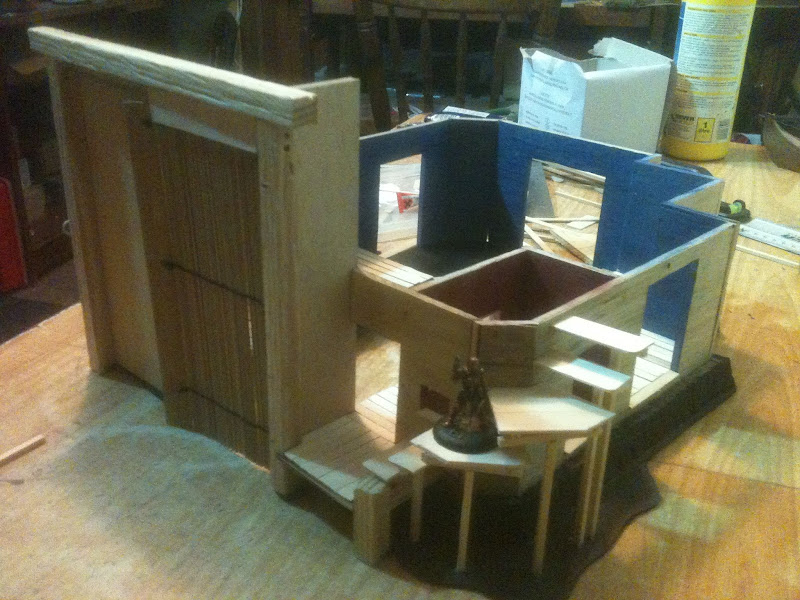
The main entrance to the warehouse is at ground level protected from the water by stone walls and has a big timber frame round it.

The walls were lightly sprayed (inside) and the timber stained.
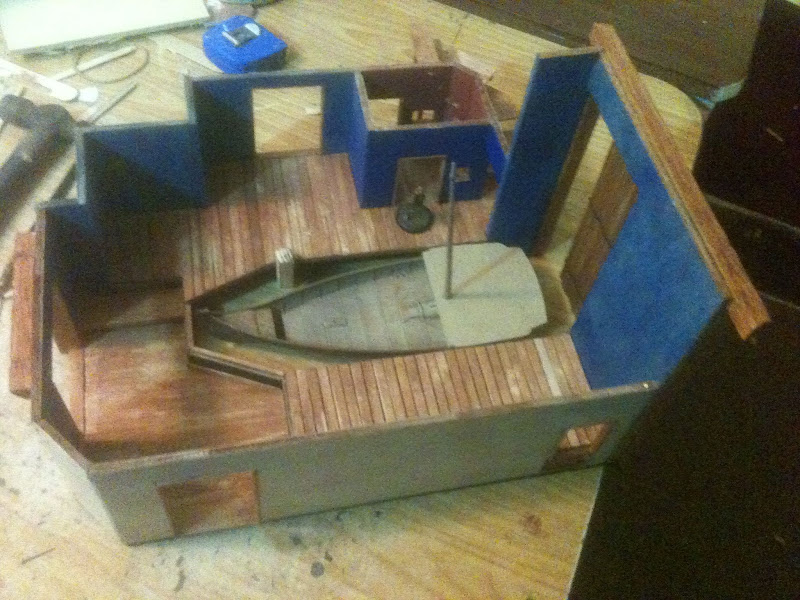
The inside and outside balconies and the first floor walls are all one a removable floor section.
The flat roof will also be removable and will have a small gambling room in the corner, but that's another days work...
-
I spot some nice wagons in some of the pics, are they home-made? If so, any chance of some close-up shots and/or tips on how to make them?
Thanks Grifonetto,
The Guild's 'Paddy wagon' was made last year from a 'Days Gone' horse drawn bus.
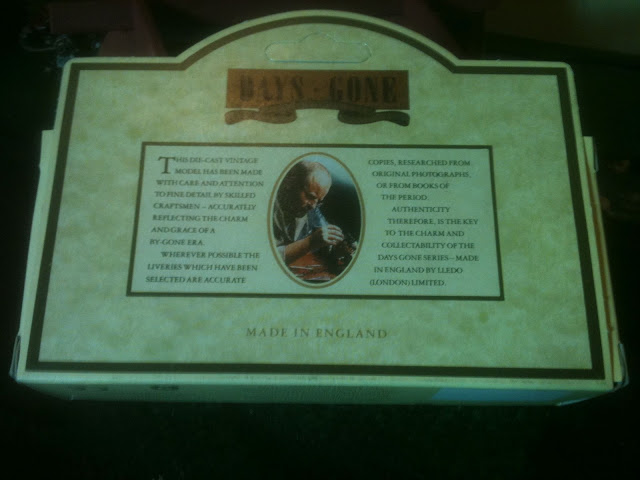
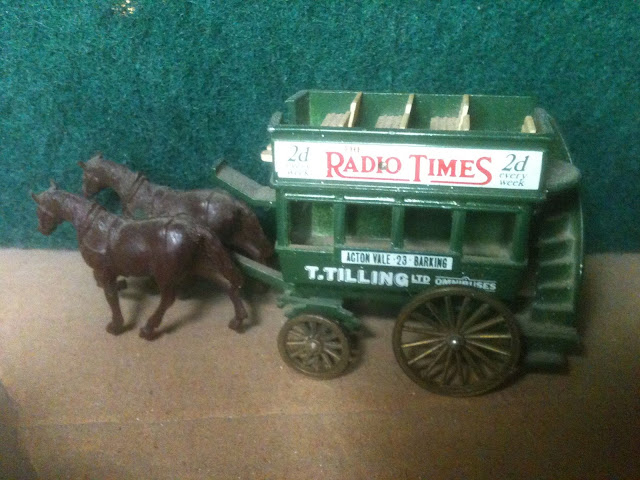
With a bit of major hacking!

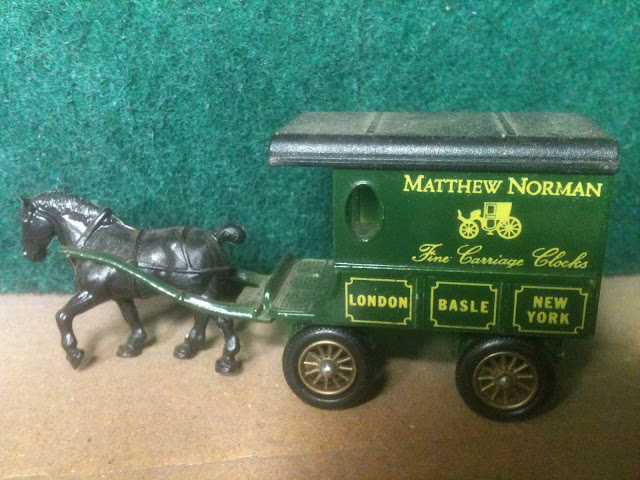
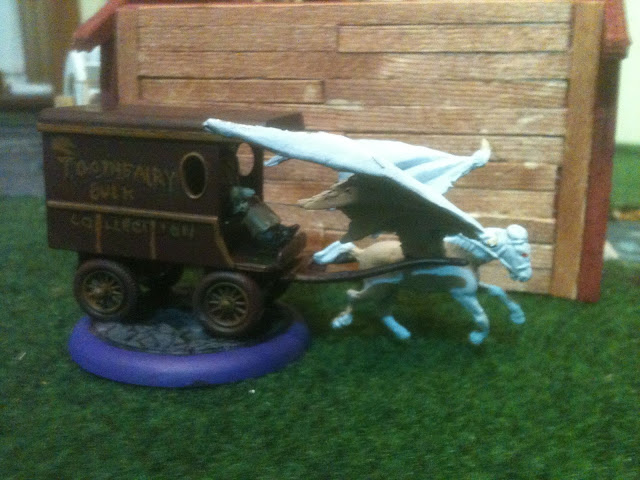
The Neverborn 'Collection Wagon' was made the night before a competition in Skiberrean at the end of last month. It was a bit rushed as it was 3 am when I started it! It needs a bit of redecorating sometime.
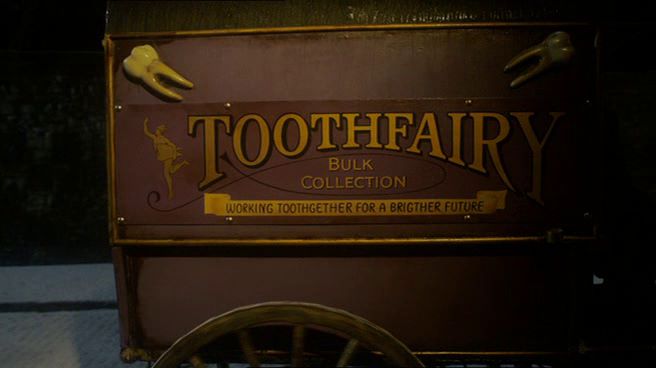
The idea came from the Terry Pratchet movie Hogfather:
I used a Days Gone wagon again
but I wanted it more Neverborn so I made a Pegasus, using a Mature Nephilim's wings and an old metal horse, to pull it through the air.
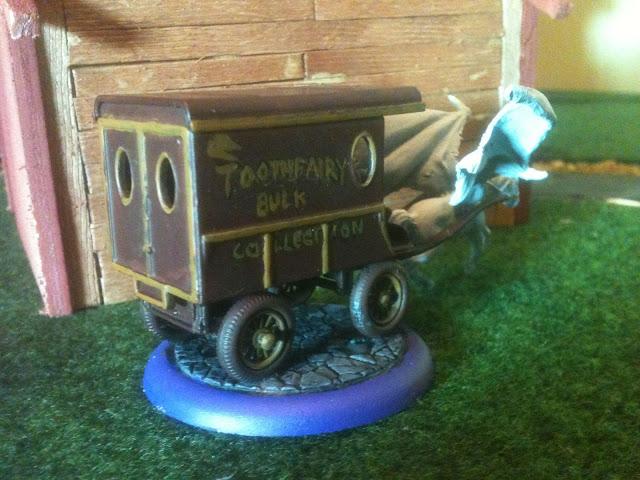

I have plans to make up a set of one for each Faction, but that is another project in progress.
I hope this helps, cheers.
-
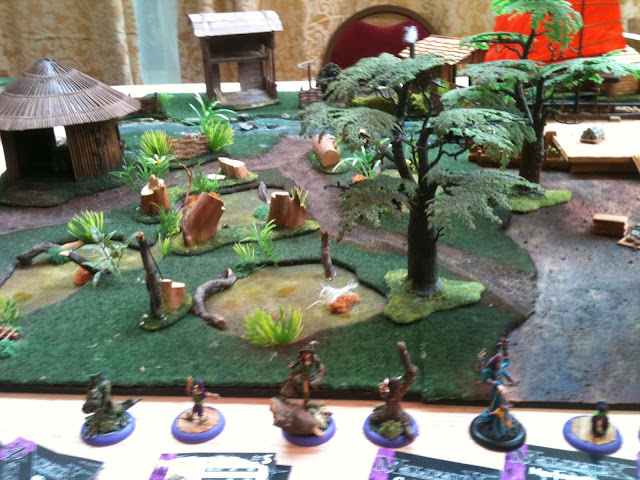
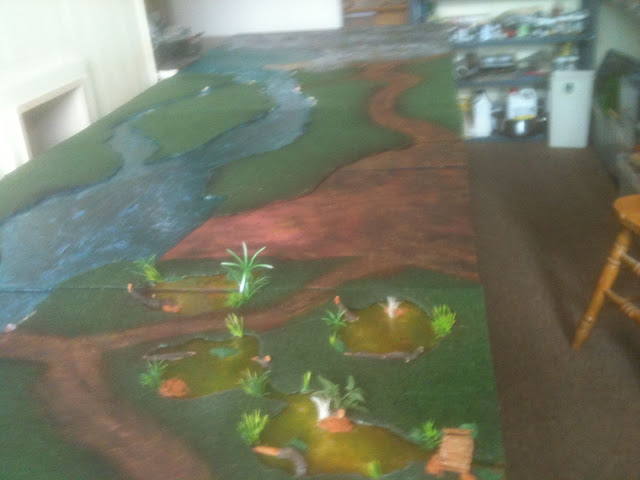
Druid's Island
Mysterious things have happened in these parts in the distant past - mysterious things are still happening today...
I wanted to put in a Henge of stones as I have fond memories of clambering around Stonehenge on Salisbury Plain in my youth.
The stones are made from high density expanded polystyrene, painted with black masonry paint and coloured in blues and greys.

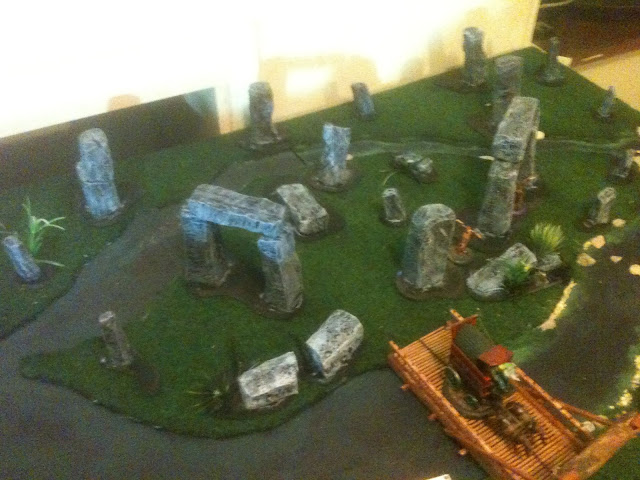
The bases will be flocked and have a few bushes and trees added.
Well that's all for now... Next update will be after the weekend when Mike will be adding details and a floor or two to his Pagoda!
-
Hi mate
Off the scene for a while with work and health so i have a lot of catching up to do....
Good to be back!
Cheers
---------- Post added at 08:37 PM ---------- Previous post was at 07:51 PM ----------
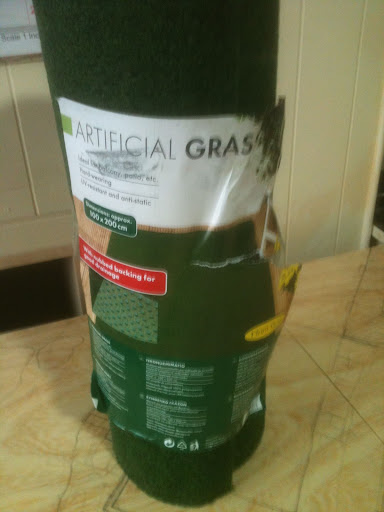
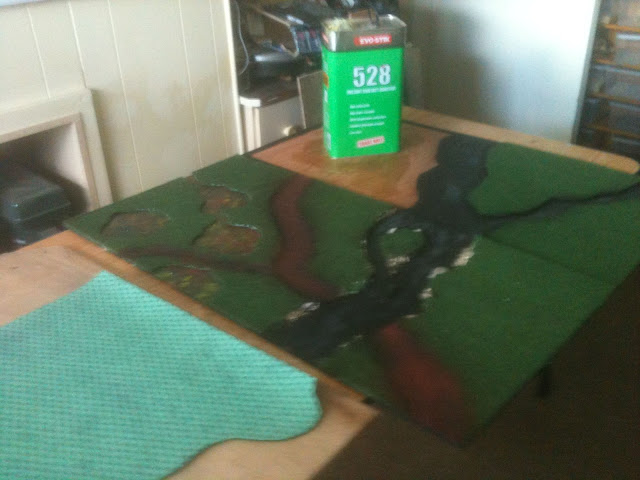
The grass mat from Lidls is very effective and looks like static grass. The only problem is that the underside has raised 'bobbles' so it is difficult to glue properly.
I tried a powerful Evostick 528, which we use at work, and smothered the edges but it is still riding up in places.
This doesn't matter in the board area as the 'raised' edges are being sealed with 'No More Nails' into which is pushed stones and flock.
The sides of the boards will need a bit of TLC later.
Footpaths were literally ground into the mat using a sanding disc on an angle grinder!
The river and bogs are just going to be painted and varnished.
The four main river board sections ( two 3ft x 18 inch boards per table) have been designed in a 'circular' manner so that one end can be fitted onto the far end - giving four table options.
The 10T board that my 'apprentice' Mike wants done fits on the end of the river boards and is an estuary/ sea port town.
The plan is to have a 10T warehouse that the boats would go inside to unload - so no-one can see the contraband cargoes - balconies inside and outside and a flat roof give plenty of gaming space.
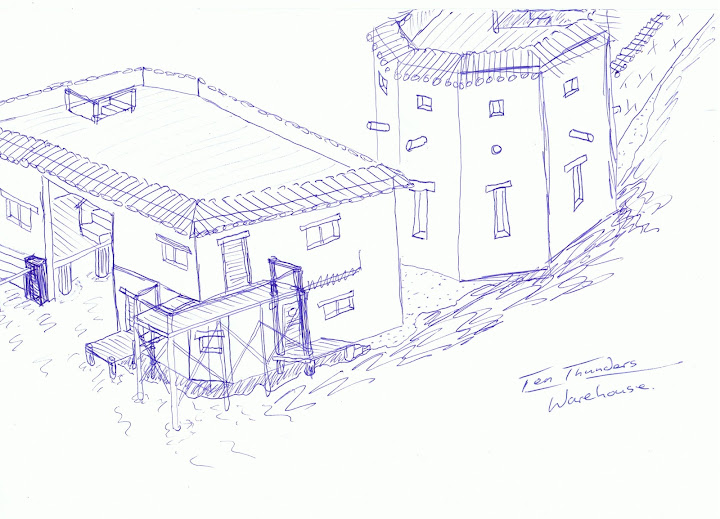
The river estuary is over shadowed by a fortified tower, and the town is protected by walls and gates.
Behind the docks is the trading area - small stores, houses and sheds - giving narrow alleyways and rooftop 'hopping'.
The centre piece of the board is of course Mike's three storey Pagoda that dominates the whole series of boards!
Mike has taken to the terrain building like a fish to water, knows what he wants, and finds a way of doing it...

Looking forward to this weekend when he is back for more...
---------- Post added at 09:02 PM ---------- Previous post was at 08:37 PM ----------
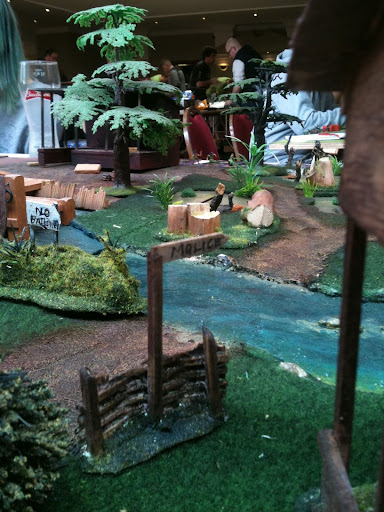
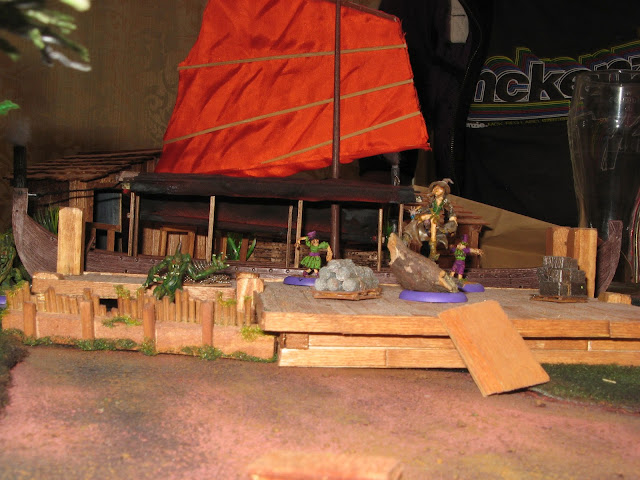
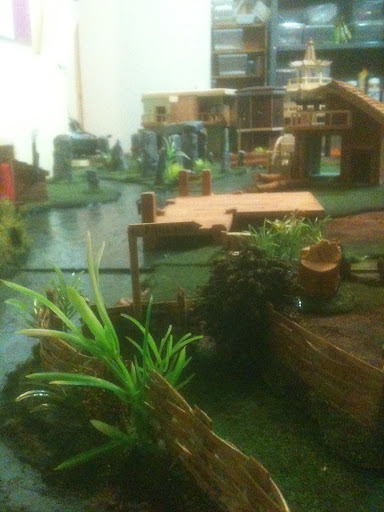
The Wharf
The village of Malice is a river trading post.
The centre point is a wharf with a boat tied up and cargo unloaded and timber stacks and smoked fish ready to go.
The jetties are made from coffee stirrer sticks, textured by firmly running them across the teeth of a craft saw, and PVA'd onto 4mm ply.
The whole thing was then coloured using Teak wood stain. Mooring rings were added to the pillars and coils of rope laid about.
There is a dam to hold back the water and stop the town from flooding.

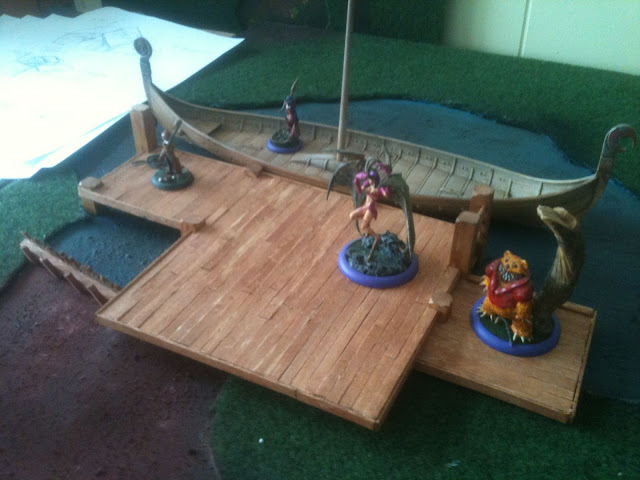
The boat is a Revell 1:50 Viking Ship, which cost me £13.99 a few years ago.
---------- Post added at 09:11 PM ---------- Previous post was at 09:02 PM ----------
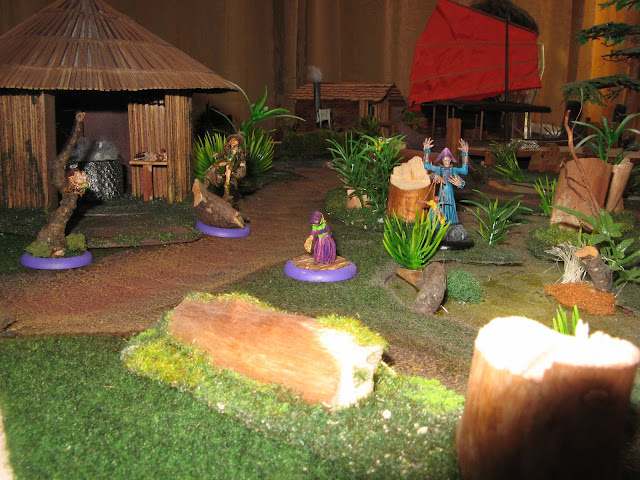
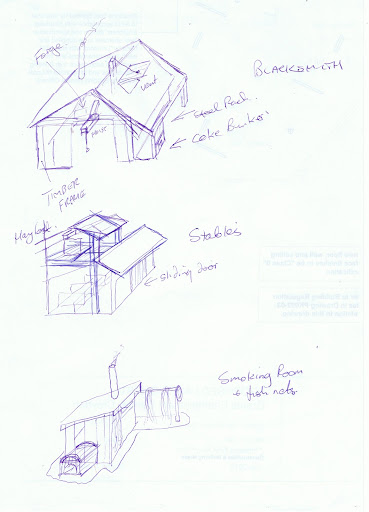
The Smokehouse
One of the village's produce is smoked fish.
The fish are hung on racks in the shed and a fire is lit in the tunnel. Leather curtains are drawn across the front to seal it up. The chimney is half way down the side of the hut so that the upper area is always smokey.
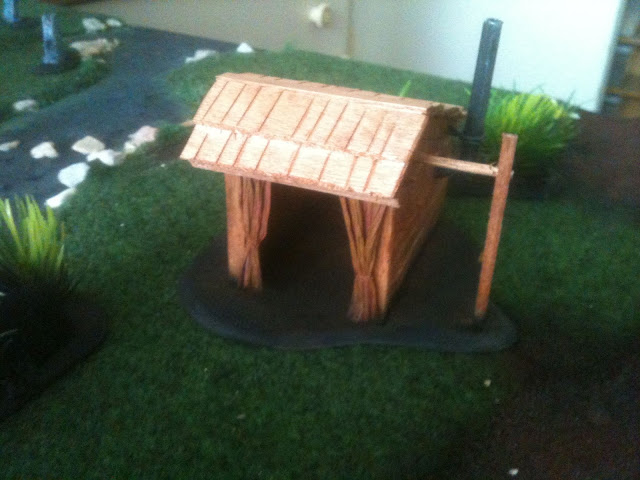
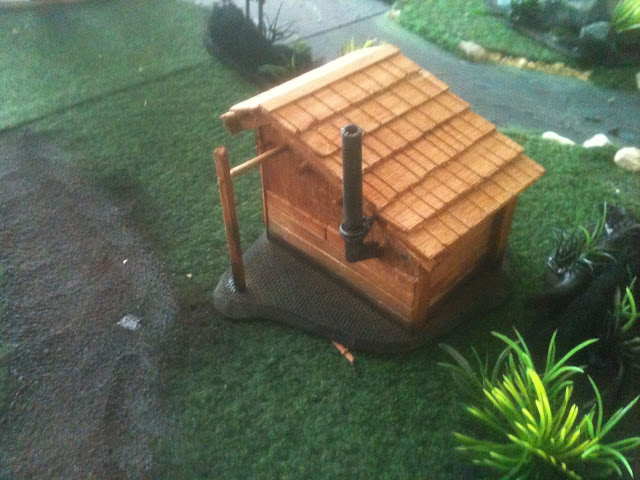
I still have to finish the base and hang some nets over the drying pole.
---------- Post added at 09:43 PM ---------- Previous post was at 09:11 PM ----------
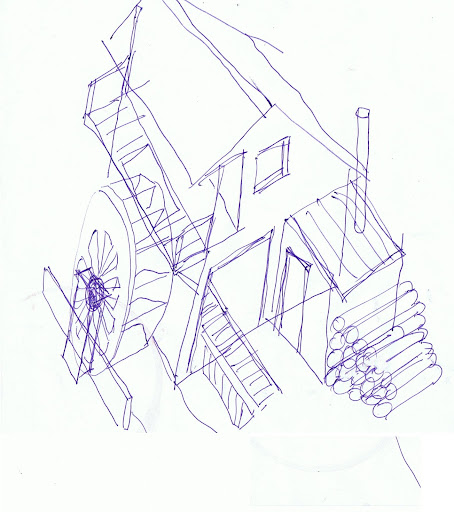
The 'Dropbridge'
I wanted a way to put a bridge across the river without it stopping the boats from reaching Malice. The solution was a bridge that could be raised or lowered but it had to be low-tech and 'made' on site.
This was the idea sketch I finally came up with:

I used teak strips, coffee stirrers, candy-floss sticks, placemat sticks, cocktail sticks and a bit of a twig...
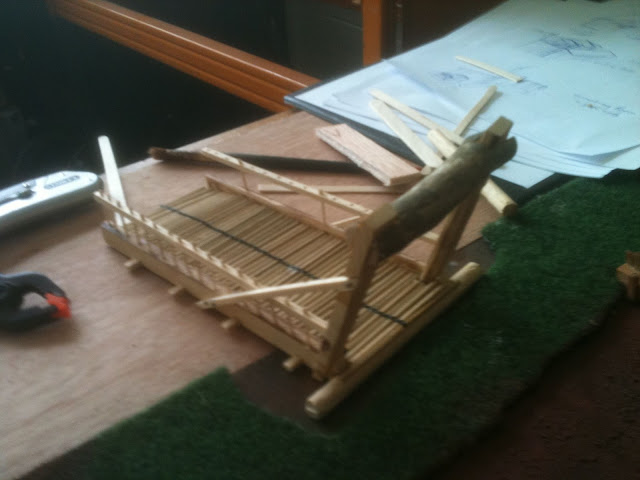
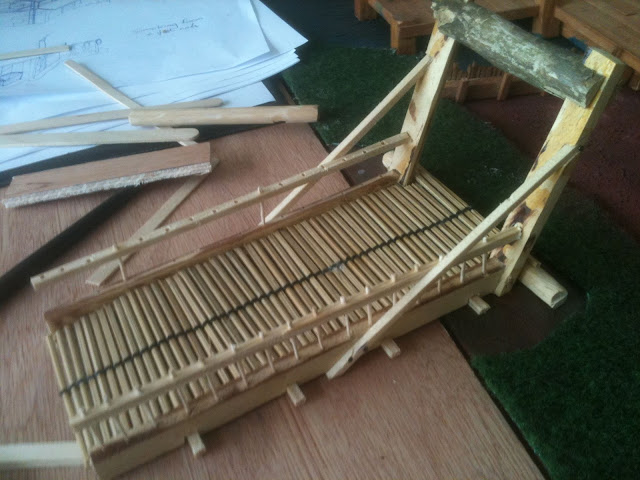
The whole thing was coloured with (as usual) Teak woodstain.
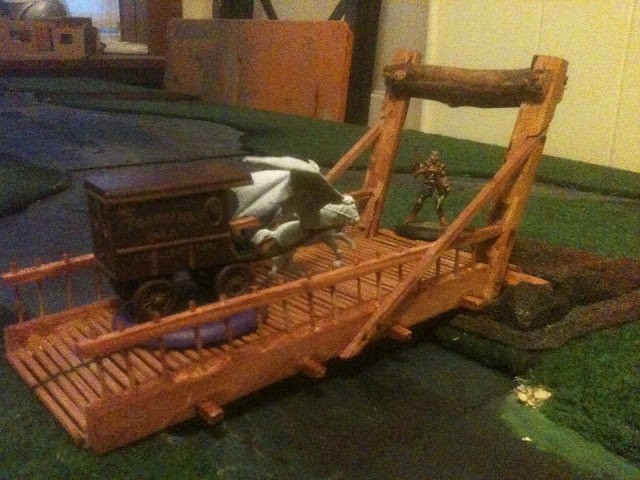
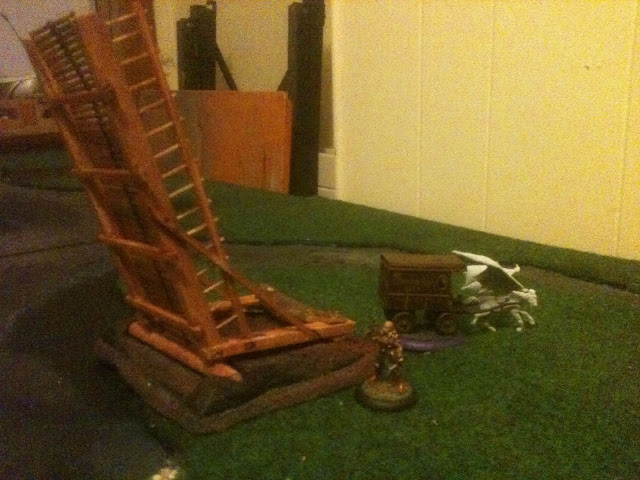
I still need to finish the base and put on the pull-ropes.
---------- Post added at 10:24 PM ---------- Previous post was at 09:43 PM ----------
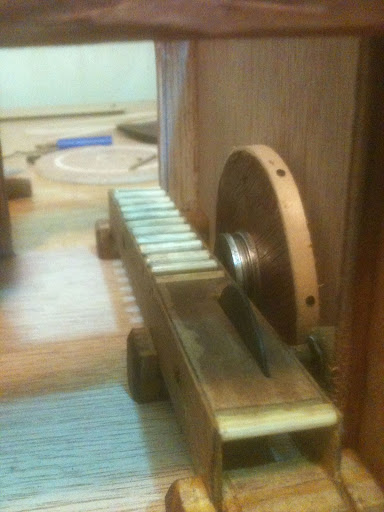
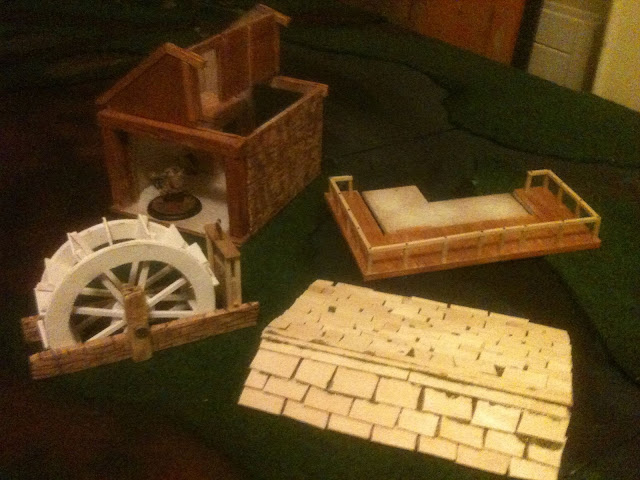
The Saw Mill
Other than mercenary work, digging for soulstones and waylaying unwary travellers, the main source of income for the village of Malice is cutting and preparing timber.
As Malice is on the river it made sense to power the sawmill by water...
The mill was made from 4mm ply and coffee stirrers.
The 'stone wall' was done with an angle grinder into the ply.
The watermill was made from ply, tongue depressor sticks, candyfloss sticks and a few washers.
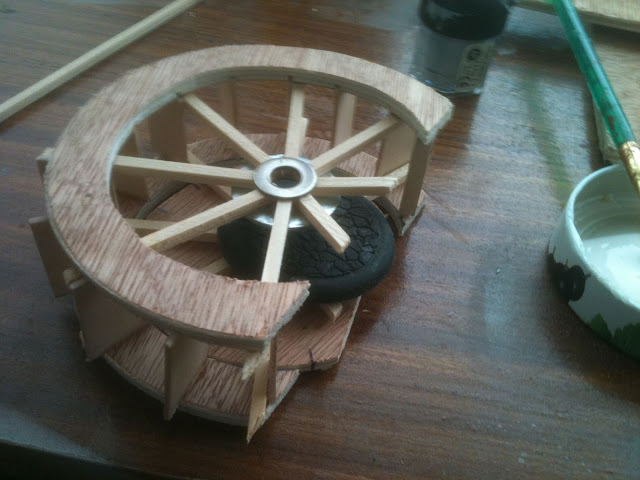
A mill race and sluice gate was made to support the wheel.

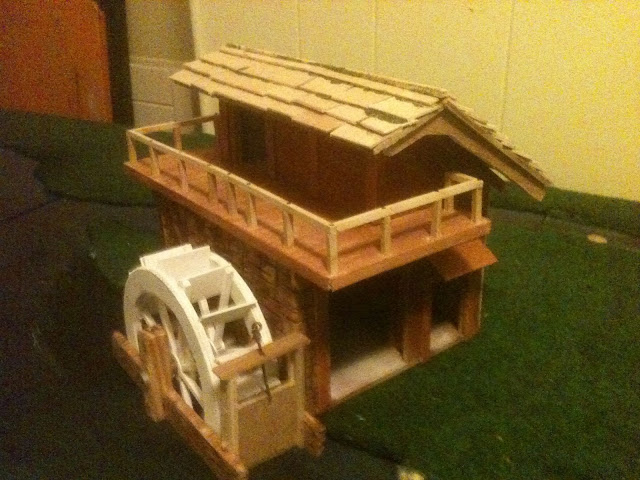
The building comes apart to play on different levels.
I still have to make the flywheel, pulleys and saw bench but this is it so far:
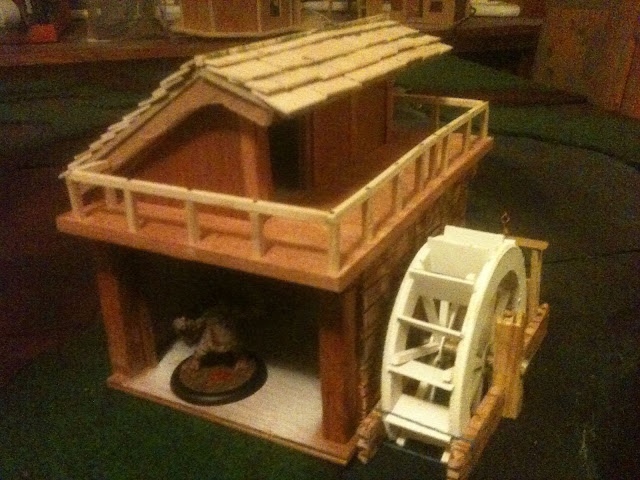

Of course there has to be some felled trees as well!
---------- Post added at 10:40 PM ---------- Previous post was at 10:24 PM ----------
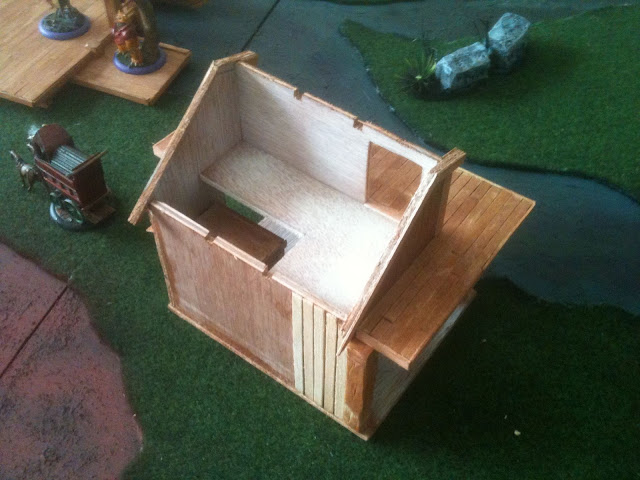
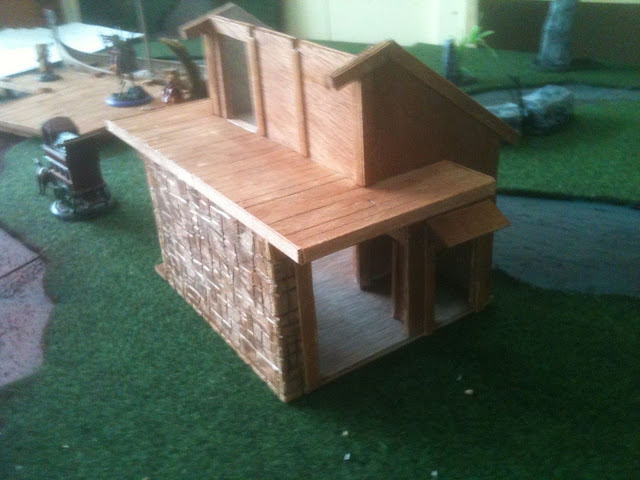
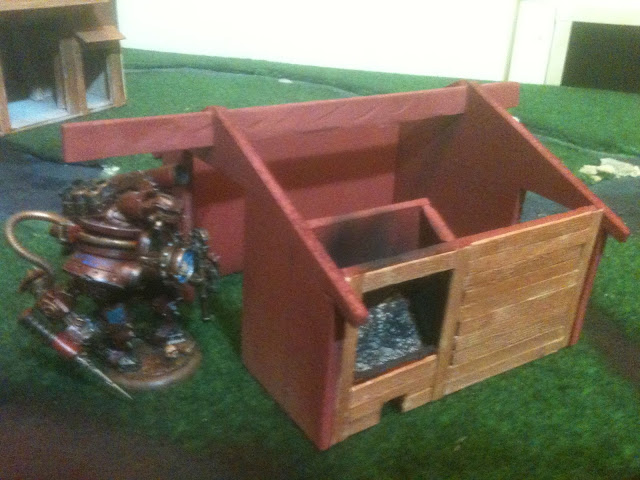
The Smithy
The Smith is an important man in any village.
This one is not adverse to helping a passing Arcanist cobble up a few helpers, or doing an upgrade on a Lazurus...if they can pay.
The ridge timber will have a pulley block and rope to lift those heavy items and there is a coke bunker on one side for fuelling the forge.
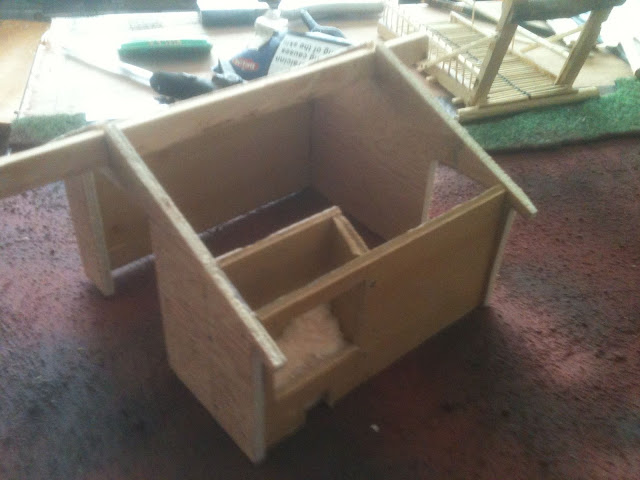
I have to make the forge, anvil and tool racks and when I buy a Lazurus I can pile up some spares in the corner!
The base and roof need doing as well...

-
Even though I still have loads of unfinished projects I was inspired last week to start a set of boards (hopefully) to be ready for a NWG (North Wexford Gamers) Competition that Tograth is running on 31st August.
The inspiration came from a Lidl's grass mat purchased off of a Skibbereen player Cian.
We need another 3 or 4 boards for the competition so I thought I would try a linked series: Boglands - Riverside settlement - Druid's Island - Ten Thunders Town, with probably more added in later.
So planning started Tuesday Evening (31st July) with a few sketches, some heavy duty glue and a 'suck it and see attitude'.

More later...
-
lol thought you had a fog machine for the first pics as I was scrolling down; they have a nice hazy appearance.
camera phone and bad light - nearly as good.
-
Here's some links for the labels and cards:

-
Where did you get those tiny blood samples?
The bags were cut out of the re-sealable ones the models come in using scissors that I heated over the gas stove. Then I shoved in some Blood Red paint, a piece of fibre optic from an old lamp, and superglue the end up.
The labels were made up in Paint and copied on to word.
The donor cards were got off the internet and copied into word to reduce the size.
(I do need to do the cards again because they are too big - but it was stupid o'clock in the morning when I was playing.)
Quick, easy and cheap!
-
Fed up with using die to mark corpse and blood counters so I made these up last night.
Eight of each - so just got to find some 'volunteers' !


(I might make some cards up on 30mm bases but they will do for now)
-
You just need a fog machine so you can have a nice little mist out on the board while playing.
That would look cool! Must add one to my wish-list!
In the meantime, just finished the foot bridge, a couple more boardwalks, and another coat of varnish:


(https://picasaweb.google.com/101349816882171524792/SwampBoardFeb252012?authkey=Gv1sRgCJCJzrnfm_7cKA)
And the rest of the crew got a quick paint job.
-
I have a game lined up for Sunday - my Lilith crew vs. Zoraida / Collodi but nether of us had a 36" board.
Thursday night I cut two 18" by 36" 6mm ply sheets (so i can fit them in the car) and set about making something quick.
I wanted to include about 25% forest, a swamp or two (25%), grassland, a river and a road.
Forests are usually a problem, but I had some aquarium plants that i could cut up and they are nice and flexible. I put some tracks in the forest to aid LOS and movement and highlight the different sections.

The river was cut out, textured and varnished and the road/track was sanded into the polystyrene to give it some profile.
I have yet to make a bridge for it, but this will be removable anyway - ie. ford or bridge.
Boardwalks, made from placemats, connect up the swamp islands.

The big trees I have had for about 40 years from a trainset.
Most of the buildings etc are stuff I had made for 40K years ago.
Just about ready for Sunday


- all I need to do now is finish painting my crew...
-
Sorry, I had posted a question that was clearly answered in the rulebook...ooops
Query re. Hungering Darkness
in The Hobby Room
Posted
Thanks for all the advice. Did a bit of green-stuffing and a bit of shaving last night and it looks good.
Very few problems with the other figures and they look awesome. Mr Graves is done too and now working on the Depleted.
I love the poses and becoming a big fan of the plastics.
Fantastic paintjob Rameses! Hope I can do something half as good.
Thanks everybody.