

nagash13
-
Posts
385 -
Joined
-
Last visited
Content Type
Articles
Profiles
Forums
Gallery
Events
Downloads
Posts posted by nagash13
-
-
i buy lots of stuff from these guys. good people. they also have a nice selection of weathering powders, and scenic base stuff. everything from scale bricks, to seasonal leaves, to snow products, to terrain, to brass etch.
-
in future projects, privateer press still sells bits unlike games workshop.
-
OK so this was supposed to be a quick step back into 40k painting, for a small 5 man squad. boy was i wrong. between this project and a certain MMO that shall remain nameless because elder scrolls online is not here to defend itself, i have totally slacked off on my wyrd painting. But this model is nearly done, and the other 4 models are equally done, minus the cammo cloak.
the cloak was done by unfolding medical gauze, inking it in a cammo pattern and then gluing it to the plastic cloak on the model(after painting the cloak). next i got 3 colors of thread, and cut a ton of short pieces. i would unravel and fray one end, then apply glue to the other end and place it on the cloak using tweezers. rinse and repeat a lot of times. the shoulders were fugly and a pain as the thread didnt weigh enough to droop down the rounded edge of the shoulder and like shingles, you need the next layer to cover the ugly attachment point of the previous layer. getting sick of the project and not wanting to just add static grass on the shoulders, i went with the paper leaves.
sorry for the lighting, it was way too harsh. it added a gloss on the armor that is not there in person, and the colors are a bit bleached. the leaves are really yellow, light brown, and a faded red.


-
i work nights and have rotating days off, so i dont really get down to grimm all that often.
-
when i started painting (way back in 97) i was learning on high elves. so i primed white. later i realized evil will always win because good is dumb. the more villainous armies were all darker, so i switched to black primer for years. last year I moved from the wonderfully dry air of california to the horribly cold(winter) or humid(the rest of the time) air of long island. because this made priming such a pain, I switched to vallejo airbrush primer, so i could prime indoors. at the time, it was only readily available in grey. now i kinda prefer it.
although i am kinda intrigued by the idea of pre zenithal highlighting.
-
So, since these models are so very much not in competition with Wyrd models, I hope it is OK to post this here. MOD's if this is not the correct place, please dont hesitate to move this to where it should be. I have no affiliation with the creature caster company, i'm just really excited as a painter for these, and wanted to share with other wyrd painters.
if you like big , like really big demons and or dragons, check out this kickstarter. he is running it a bit differently than most. instead of dangling a carrot of more and more models to entice higher and higher pledges(and later and later shipping dates), his plan is for week one unlocks to be kickstarter exclusive bits (like a second head or weapon option) added to the original model increasing the value of what you already pledged for. week 2 will be most likely another 3 or 4 models added with some additional unlocked bits. then in the final week(3) offer new package deals that give more options to include the added models.
these models are just begging for someone like Mako to go do town on these and really make them shine.
https://www.kickstarter.com/projects/jeremyglen/creature-caster-first-wave
-
if they had noses they couldnt live in the swamp. do you know how much swamps stink? its horrid
-
nice work. looks creepy and very outlandish in a perfectly alice in wonderland way.
-
-
the dowels that keep the paint from falling behind the rack were $0.39 each and i used 8. the horizontal strips i found in a bin of project boards. i want to say they were about $1.50 each give or take? again i used 8. If i had access to a table saw and miter saw, I could have gotten bigger and cheaper wood to save even more, but i did this whole project on my apartment room floor with hand tools. hand saw, hammer, finishing nails and wood glue. i did cheat and use a power drill for the holes the dowels went through.
all together i would say it was less than $20 including the nails
-
i kinda want 2. one to paint up like a evil carebear, and one that i shall keep secret unless someone beats me to the punch on the paint scheme
-
plastic glue does solve all assembly issues with the exception of tiny feet to resin bases.
i've found gluing an object for the model to stand on, on the base gives you something better to pick the model up with... for example someone glued a barrel to a base, and then glued the zombie chihuahua to the barrel. by only picking the model up via the barrel, the chihuahua does not snap off.
for my plastic nurses i was able to drill a hole at an angle from the ball of the foot towards the ankle. i then use a piece of florist wire with a sharp bend as my pin. not sure what i'm gonna do for candy. i may take a piece of scrap plasticard, and chip it up to look like a piece of loose flagstone, glue that to the resin base, then plastic glue her tiny little feet to the new plasticard flagstone.
-
very nice. i noticed my board is sort of bowing. when folded closed the open side resembles a ducks bill. i may have to do something like this at some point. but for now i have my button piles on 40mm bases as impassible terrain, and the puppets bases have coffee stirring sticks glued down and varnished to look like hardwood flooring.
-
ok sebastian finally done

-
creepus is awesome.
-
i like it. i'll be buying one. but with my current backlog of projects, i'll just wait for it to show up at my FLGS.
-
killjoy has junk...... its just under his overhanging gut fold
-
normally i'm a stickler for fire is lightest at the source and gets darker as it moves out, however, in the case of fire coming off bone, i find the reverse to look better. especially a magical flame like you did here. i like the way the blue creates a nice barrier showing where bone stops and fire starts.
-
 1
1
-
-
that chompy is top notch work. i'm a bit jealous of whoever commissioned that.
-
man those killjoy face chains are gonna be super fiddly tiny. looks like an awesome model to improve painting undead flesh on though. lots of surface area.
i will pick up the teddy to hang out with baby kade.
-
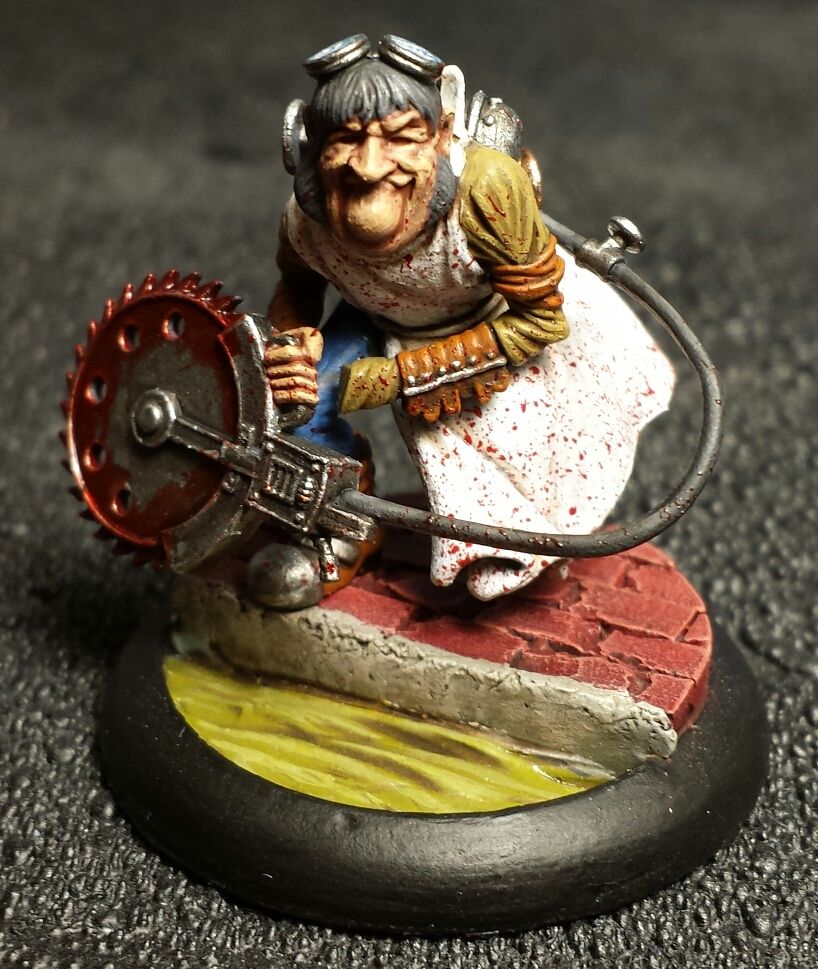
question, I have this set on the sprues still. which models do i need to paint in sub assemblies to prevent hair ripping frustration like i'm currently suffering with onehand McBuzzsaw in the McMourning boxet set. i really wish i had not put his arms on prior to paint now.
-
mine arrived. i would assume customs might be delaying your package if it is international.
-
the orange worked very well. very nice group of models you have there
-
1
-
-
i think the blacklining you do really makes the details pop to the eye. again, hook me up with your flowers source.


Captain R
in Miniature Showcase
Posted
what you do with the eyes on these minis is awesome. really great work.